WPLift is supported by its audience. When you purchase through links on our site, we may earn an affiliate commission.
What is php.ini in WordPress? How to Locate and Edit the file?
The php.ini file is a fundamental component of your WordPress installation, playing an important role in configuring and fine-tuning the PHP settings that power your website.
In this guide, we’ll answer all of your key questions about php.ini, including where to find it, how to edit its PHP code, and, crucially, how configuring this critical file can benefit your website.
What is php.ini in WordPress?
PHP.ini is a configuration file that hosts all of the PHP settings for your WordPress website.
But, what exactly is PHP?
In a nutshell, it’s a server-side scripting language designed to create dynamic, interactive websites and applications.
In the case of WordPress, PHP is used in the creation, management, and delivery of your site and its content.
PHP.ini file defines how PHP works throughout your site, with customizable settings that affect your WordPress installation’s performance, security, and all-around functionality.
The settings found in this file include:
1. File upload sizes
2. Memory limits
3. Maximum execution time
4. Error reporting
5. Database connections
6. Session handling
7. Extensions and modules
We’ll show you how to configure all of these settings later in this guide, but before we can do that, we need to show you how to find the PHP.ini file in the first place.
Where is php.ini in WordPress?
The PHP.ini file is typically found in the root directory folder of your hosting server, which is usually called public_html.
There are multiple ways to access this file, the easiest of which include:
A. Accessing The PHP File Via Your Web Host
The simplest way to find your WordPress PHP.ini file is via your hosting company’s file management tool.

For example, if your host runs on cPanel, to cPanel – Files – File Manager.

From there, navigate to the public_html folder.
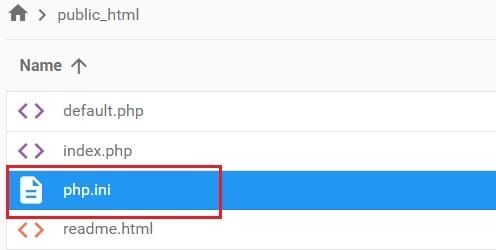
You should see your PHP.Ini file in this folder.
B. Accessing PHP.ini via FTP
If you prefer to use FTP to access WordPress, you can still locate PHP.ini that way.

Simply log in to an FTP client, such as Filezilla, and navigate to the public_html folder.
How to Find the PHP.ini File Location
If your PHP file isn’t in the public_html folder, there are two probable causes.
1. Your Hosting Company Doesn’t Allow Access
Some web hosting providers, such as Hostinger, don’t allow users on shared hosting accounts to access the PHP.ini file.
If you’re a Hostinger customer, you can access the same configurations found in PHP.ini via your dashboard or by editing the same access file that you may already be familiar with if you’ve ever had to set up a 301 redirect.
2. The PHP File is in a Different Location
Assuming your hosting company allows you access to the file, you most likely can’t find the PHP.ini file in the root directory because it’s in a different location.
In that case, there are two easy ways to locate it:
A. Using the WP File Manager Plugin
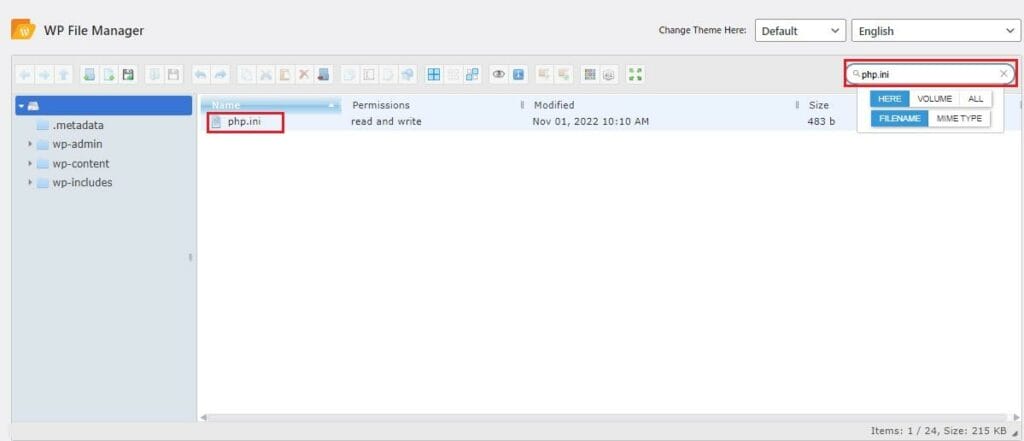
The simplest solution to find php.ini without leaving the WordPress environment is to use a plugin, such as WP File Manager.
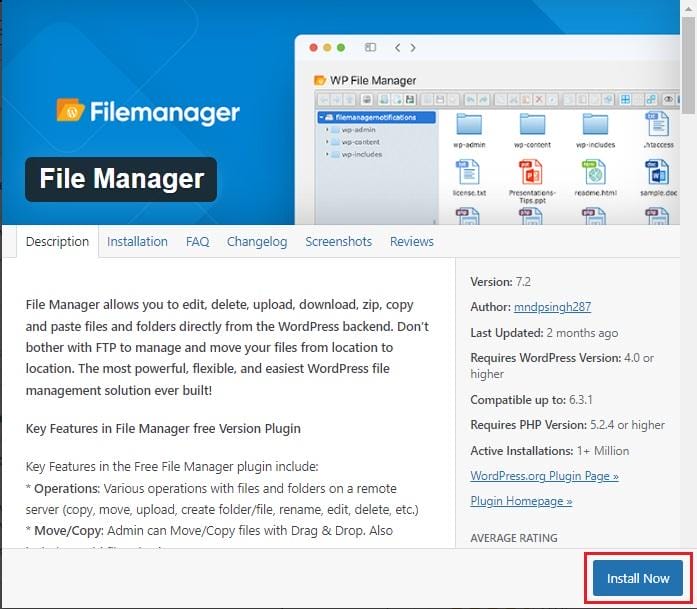
Once installed, you can access the plugin from your dashboard, and use the search function in the top-right corner to locate PHP.ini.
B. Using a phpinfo.php File
More experienced users may prefer to find PHP.ini using another file called phpini.php.

To do this, open up a new text document and enter the following line of PHP code:
<?PHP phpinfo(); ?>
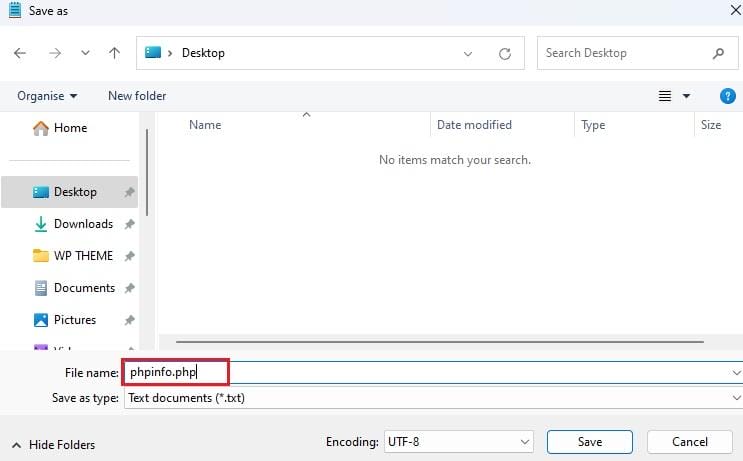
Save this file as phpinfo.php.

Next, you need to upload this file to the root directory of your website, either using your hosting company’s file manager, your FTP account, or the File Manager plugin we just showed you.
With that done, open your browser and navigate to:
www.yourwebsite.com/phpinfo.php
Be sure to replace “your website.com” with your actual domain name.
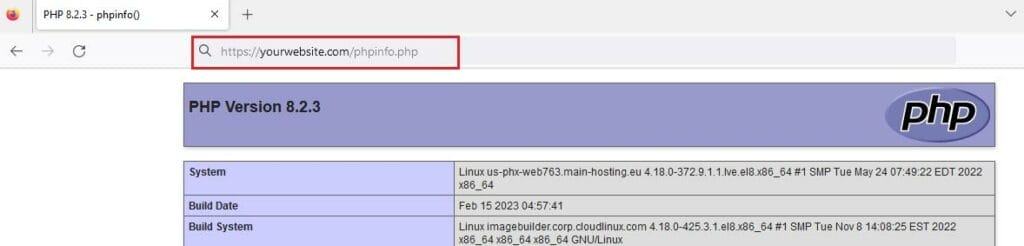
You should now see a comprehensive table detailing all the information about your WordPress PHP use.
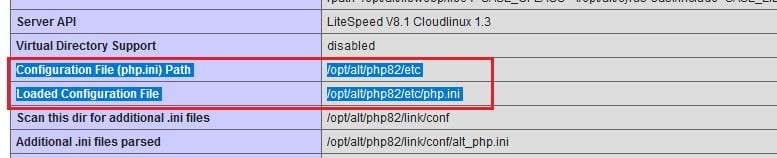
Here, look under Configuration File (php.ini) Path and Loaded Configuration File, both of which list your PHP.ini location. You can now navigate to that file using your preferred method (File Manager or FTP) to begin making the changes you wish to make.
How to Edit Your WordPress php.ini File
Once you’ve found your file, you can edit it to solve any number of common WordPress errors or improve the performance functionality of your site.
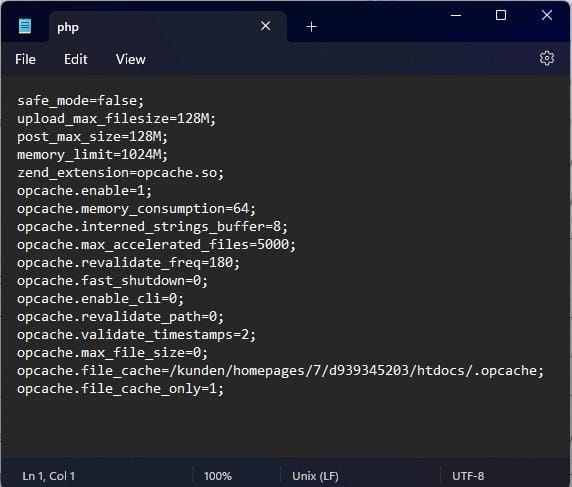
To do that, first, download the file to your device, and open it in a standard text editor.
You can then go forth and change any of the PHP configuration settings, including, but not limited to:
A. upload_max_filesize
If you’ve received the common uploaded “file exceeds the upload_max_filesize” error message while attempting to upload pictures or videos, this is the setting you’ll need to change.
Find this value in your php.ini file and increase it.
After re-uploading your edited PHP file, you should find that you can now upload larger-sized media files without any problems.
B. memory_limit
Another common reason why files may not upload properly is that the memory_limit value is set too low.
This can also be the reason why WordPress times out when trying to execute certain commands.
By default, the memory limit is set to 256M, but you can increase it to upload larger-size files or ensure that large, media-intensive pages load properly.
C. max_execution_time
max_execution_time specifies the maximum amount of time, in seconds, that a PHP script is allowed to run before it’s terminated.
If you’re struggling with WordPress performance issues, performing complex database operations (such as importing large datasets or running extensive queries), or finding that complex plugin functions require extra time to process, increasing the max_execution_time value will prevent such resource-intensive tasks from timing out.
D. post_max_size
post_max_size controls the maximum size of POST data that PHP will accept. If you’re dealing with larger forms or file uploads, then you can increase this configuration in order to allow larger data submissions to your server.
E. error_reporting
If you’re troubleshooting or debugging your PHP code, use the error_reporting configuration to manage which error messages are displayed when the display_errors is set to ‘on.’
What You Need to Know About php.ini: Key Takeaways
By now, we hope you’ve learned everything you wanted to know about how to locate PHP.ini in WordPress and edit the PHP code to improve the functionality of your website.
To sum up, here are the key lessons from this guide:
- PHP.ini contains your WordPress PHP settings – PHP is responsible for many aspects of how your site runs. The PHP.ini file defines how it’s configured for your site.
- PHP.ini is usually located in your root directory – Typically, this is the public_html folder. You can locate it using the WP File Manager plugin or a phpinfo.php file if it’s not there.
- Changing the PHP.ini configurations can improve many aspects of your site – including preventing image upload errors and ensuring resource-intensive tasks execute correctly.
If you’ve already done all this and you’re still experiencing performance issues with WordPress, it may be that your PHP version is outdated. In that case, be sure to check out our guide on how to upgrade WordPress PHP to learn how to install the latest version.