WPLift is supported by its audience. When you purchase through links on our site, we may earn an affiliate commission.
How To Change Domain Names for Your Self-Hosted WordPress Site
Need to move your WordPress site to a new domain? While no one sets out intending to change domain names down the road, it’s certainly something that can happen to you.
Maybe that perfect domain name opened up, maybe you need to rebrand…who knows. It happens.
But when the time comes to change the domain name for your WordPress site, how the heck do you actually go about doing it? In case you’re wondering – you can’t just go in and change the domain name in your settings. Things are a little bit more complicated than that.
There are actually a bunch different ways you can go about changing your domain name. One way is to use the free Duplicator plugin. I love Duplicator and recommend that method frequently. But…I actually think there’s an easier way to change your site’s domain name (assuming you’re staying at the same host).
Here’s how…
The Easy Way to Change Your WordPress Site’s Domain Name
The reason that you can’t just change your domain name once and call it a day is because of your database. While your core theme files don’t really care what your domain name is, your database requires some special attention to get it to use your new domain name.
That’s why I like using the WP Migrate DB plugin from Delicious Brains. Without getting into serialization and other database issues, I’ll just sum it up by saying that WP Migrate DB does everything necessary to get your database up and running with your new domain name.
With the plugin, this is all that you need to do to change your WordPress site’s domain name:
- Copy your files from your current domain folder to your new domain folder
- Export your database from your current site using WP Migrate DB
- Use PHPMyAdmin to import your updated database to your new site
- Update your new site’s wp-config.php
- Set up redirects to send traffic from your old site to your new site
If you’re curious where I got this from, I’m pretty much following the WordPress Codex entry – just with a few tricks to save you some time.
Why Not Just Use the Duplicator Plugin?
If your site is small, you can use the Duplicator plugin. Joe even wrote a post showing you how to use Duplicator. Just follow his instructions and you can do it that way too.

Article Continues Below
I’m recommending my method because it works no matter if your site is small or large.
Assuming you’d like to go ahead with my recommended method, let’s get started…
Step 1: Copy Your Files to Your New Domain
The first thing that you need to do is copy over your files from your existing domain to the folder for your new domain.
If you’re using cPanel, this usually involves creating an Addon domain from your cPanel dashboard for your new domain.
Once you’ve got that added, you’re ready to move your files. The easiest and quickest way to do this is to use cPanel’s built-in File Manager tool. While you can always use FTP, it’s going to take you a lot longer.
Here’s how to do it:
For my example, I’ll be migrating my site “colinstest.website” to “newdomainexample.colinstest.website”. But the process is exactly the same for standalone domains. I’m just using a subdomain so that I don’t have to buy a new domain for this example.
Find the File Manager option:

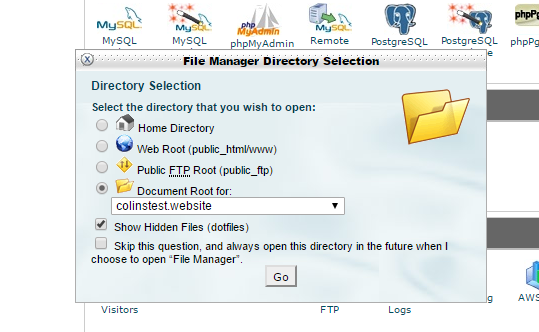
And open the root for your current domain name:
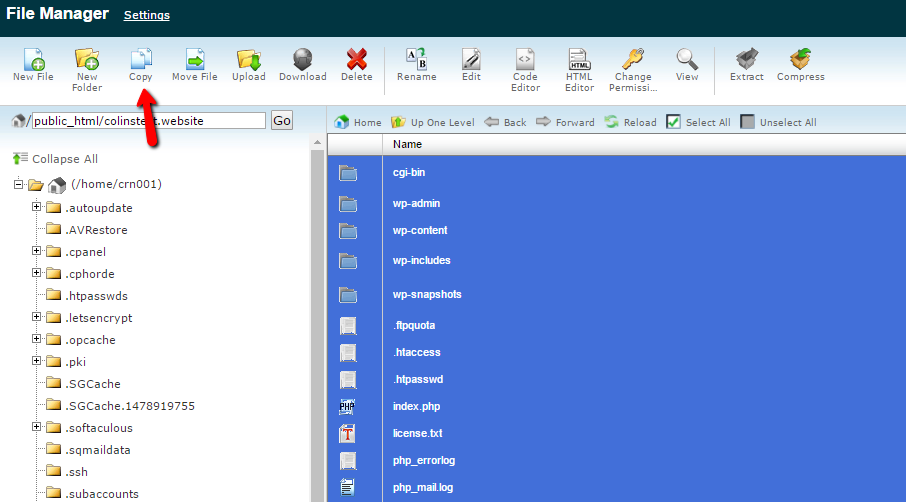
Then, select all files and folders and choose the Copy option at the top:
Make sure the Copy file to path is to your new domain (you can find this in the Document Root column of the Addon Domains section of cPanel if you’re not sure where to get it):
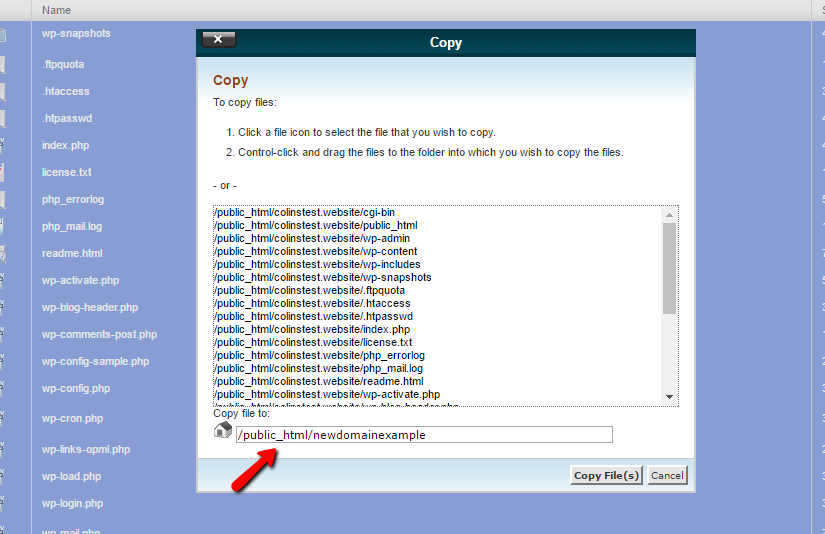
Then click Copy File(s).
Because the copying happens server-side, it should only take a second (compared to potentially hours via FTP depending on your Internet connection and the size of your site).
Step 2: Export Your Database With WP Migrate DB
Now that your files are copied over, you need to export your database using WP Migrate DB. Install the plugin and head to Tools → Migrate DB.
Leave the Find side untouched, but enter your new domain and domain path in the Replace column like this:

Then click Export.
The plugin will export your database (with the updated values) and start a .sql.gz file download.
Keep this file, as you’ll need it in a second.
Step 3: Create a New Database
While you could just overwrite your existing database, I think the safest method is to create a new database to house the database that you just exported.
You can do that by going to MySQL Databases in cPanel. From this panel, you’ll need to add a new database:

Then, you’ll need to create a new database user and assign that database user to your database with All Privileges:
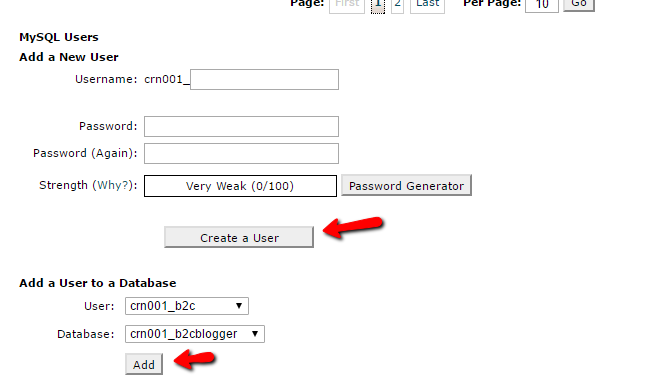
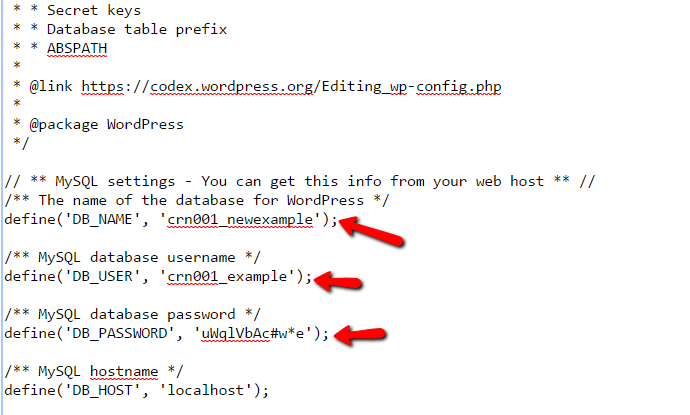
Make sure that you save all of the information with regards to database names and passwords because you’ll need it to update your wp-config.php file in a second.
Step 4: Import The New Database File to New Database
Now that you have your new database, go back to your cPanel dashboard and find the phpMyAdmin option:

On the next screen, select the new database that you just created and then click Import:

Upload the .sql.gz that you got from WP Migrate DB and hit Go:
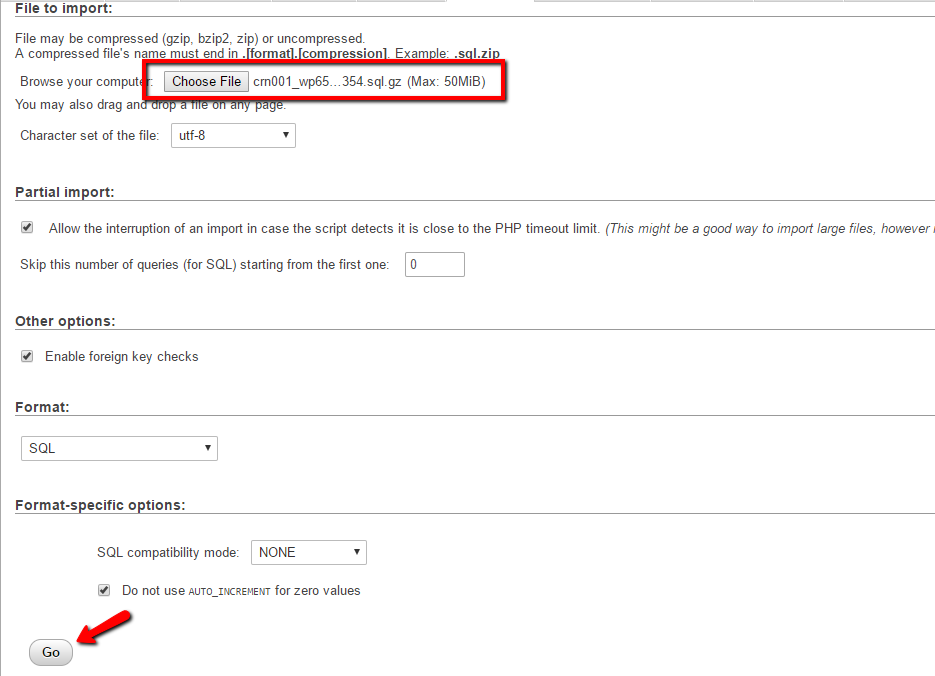
And now you have a version of your database that reflects your new domain! All that’s left is to go into wp-config.php and tell your WordPress site to use this new database.
Step 5: Update wp-config.php
If you go to your WordPress site – you’ll probably see that it’s working normally. But it’s not right yet. Because it’s actually using your OLD database still. To make it use the new, updated version of your database, you need to update your wp-config.php file to use the database that you just created.
To do that, you can use cPanel’s File Manager tool to edit the file:
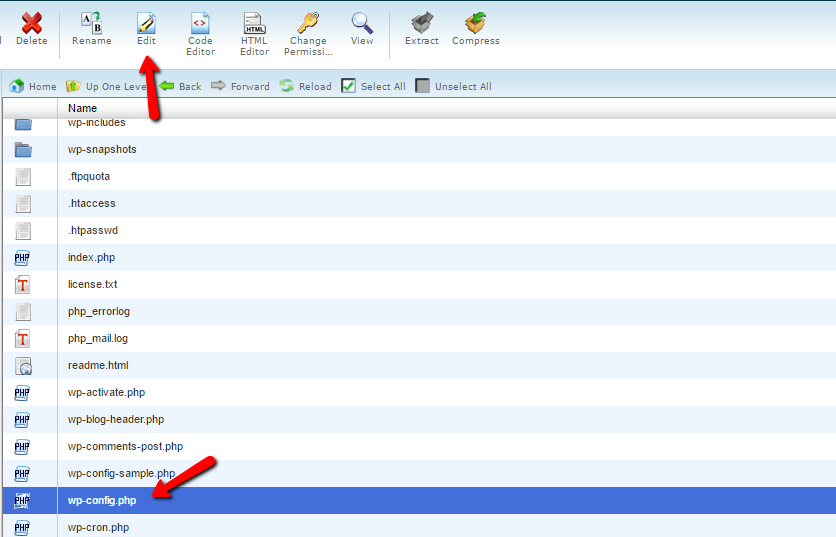
And then just change the information inside the apostrophes to reflect your new database name, username, and username password:
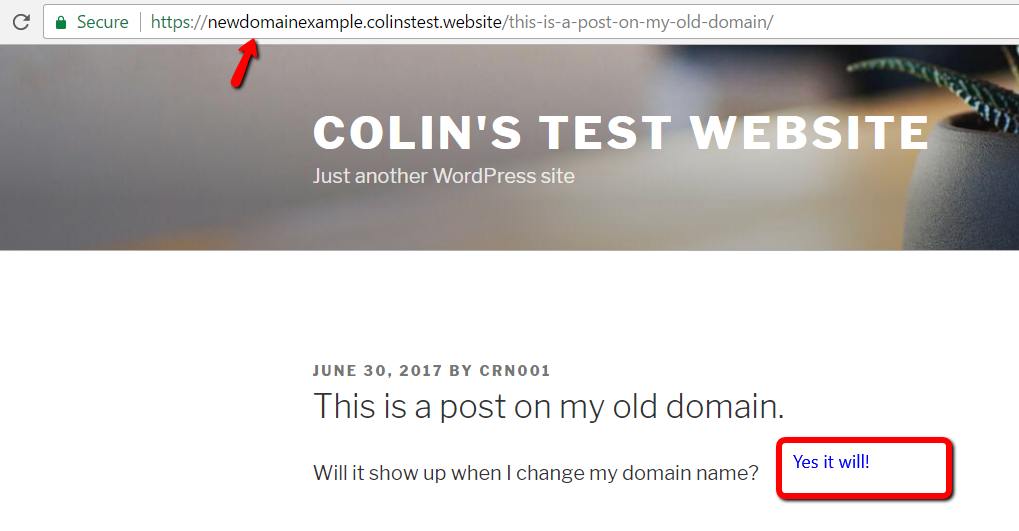
And with that – you just successfully changed your WordPress site to a new domain name. Congrats!
Don’t Lose Your Old Traffic – Set Up Redirects
While your site should now be fully functioning at your new domain name, you’ll still want to do at least one more thing:
Redirect traffic from your old domain to your new domain.
See – you’ll still have people linking to your old domain name, as well as people who try to directly access your site at your old domain name. You don’t want to lose these valuable links and visitors, so you should take a second to set up something called a 301 redirect.
With a 301 redirect, anyone who tries to access your old domain name will get automatically sent to the corresponding URL on your new site (assuming you kept the same permalink structure).
To set those redirects up, you just need to put the following code in the .htaccess file of your old domain name (which, again, you can edit via File Manager):
#Options +FollowSymLinks

RewriteEngine on

RewriteRule ^(.*)$ https://www.newdomain.com/$1 [R=301,L]
Replace the example with the actual URL for your new domain name. Then add it to the top of your old domain’s .htaccess file.
Wrapping Things Up
Depending on what other tools that you’re using, you may also need to update your information to reflect your new domain name in things like Google Webmaster Tools and Google Analytics.
But this process should cover the core aspect of changing your WordPress site’s domain name.
Again – this is by no means the only method to change your WordPress domain name – but it is the easiest (and quickest) in my opinion.
Now over to you – do you have any tips for changing your site’s domain name? Leave a comment and help everyone do it better!


The steps are well explained, thanks for the knowledge
thanks, this is very usefull
thanks,…nice informations..
What the risk if we change domain? If i a beginner in this one, i can do it by my self or better to help by who know about this. (Sorry, i dont understand english too much)