WPLift is supported by its audience. When you purchase through links on our site, we may earn an affiliate commission.
5 Ways to Add an Affiliate Disclosure to Each WordPress Blog Post

So, you’re ready to kickstart your journey to affiliate marketing success, but the thought of adding an affiliate disclosure to each WordPress blog post you create is hardly one that appeals.
Sure, you’ve heard that it’s necessary, but writing that disclaimer before every post sounds like a cumbersome chore.
If that’s what is weighing on your mind right now, we’ve got some good news for you:
There are a number of ways that you can automatically add fully compliant disclosure statements to your affiliate blogs in just a few clicks, five of which you’ll learn in this guide.
Of course, each one of these methods requires a few minutes of set-up time first, but as you’ll see in our easy-to-follow instructions, those few minutes will help make you a much more efficient blogger.
3 Reasons You Need to Add Affiliate Disclaimers to Your Blog
Given that there’s work involved in each of the five methods below, you may be wondering why you should even bother in the first place.
Here are three reasons why it’s really worth the effort.
1. Build Trust and Confidence In Your Readers
If you want readers to click on your affiliate links, they first have to trust you, and it’s much easier to trust you if you’re open and upfront about your motivations for creating your blog post.
Yes, your main motivation is to help readers find a solution to their problem by recommending products or services you genuinely believe in, but you’re also looking to make money from those recommendations, so be honest about it.

Article Continues Below
Readers appreciate an ethical and transparent blogger who is honest about their monetization practices much more than one who keeps their financial incentives a secret.
2. Affiliate Programs Require A Disclaimer
Even if you’re the kind of shady, unethical blogger who doesn’t care about their readers (which we’re sure you’re not!), you still may have to post a disclaimer as a condition of participation in your preferred affiliate program.

For example, one of the world’s biggest and most popular programs, the Amazon Associates Program, requires that you display a disclosure with your affiliate links in a way that is “near any affiliate link or product review in a location that customers will notice easily.”
In other words, your readers shouldn’t have to scroll all the way down to your footer to find your disclosure.
Elsewhere, although affiliate marketing networks like CJ (formerly Commission Junction) don’t have their own rules about disclosures, their individual advertisers do, so you’ll need to add one to be accepted by their programs.
3. It’s The Law
The final but perhaps most important reason to add affiliate disclaimers is that you’re obligated to by law.
To stamp out deceptive advertising practices, the Federal Trade Commission (FTC) requires you to disclose any financial arrangements between you and the companies you promote on your blog, including via affiliate programs.
We recommend checking out this primer on the FTC Endorsement Guidelines to learn more about your legal obligations as an affiliate marketing blogger.
How to Write an Affiliate Disclosure For Your Blog
Before you can begin automatically adding affiliate link disclosures to every post, you must determine what that disclosure will say.
Here, you ultimately want to create a more extended version for maximum transparency, and a shorter version for adding to your posts.
Article Continues Below

1. The Long Version: A Dedicated Disclosure Page
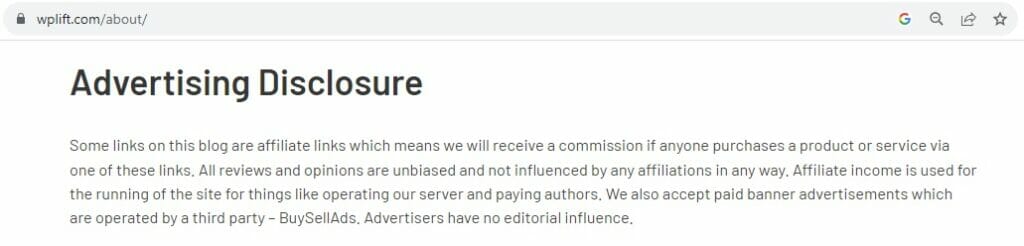
As a means of best practice, it’s a good idea to create a dedicated page for your disclosure notice, or if it’s pretty short, at least add a section to an existing page, such as we’ve done with the Advertising Disclosure on our About page.
To help cement that bond of trust between you and your readers, consider adding three key things to this page:
- A straightforward and transparent disclosure about your WordPress affiliate links, and how you earn from them.
- Why do you use affiliate links in the first place? (for example, to fund the maintenance of your site)
- Assuming it’s true, reassurance that your blog shares honest, unbiased opinions that aren’t influenced by your affiliate advertisers (i.e., companies aren’t encouraging you to write untruthful, overly-flatting reviews in exchange for compensation).
2. The Shorter Version: The In-Post Disclosure
Of course, all this can soon turn into a few paragraphs, so we recommend adding it to a separate page.
However, a several-paragraph disclosure isn’t ideal for placing at the top of each blog post. So, the best approach is to create a much shorter one that links to your entire page.
Here, you can keep things simple.
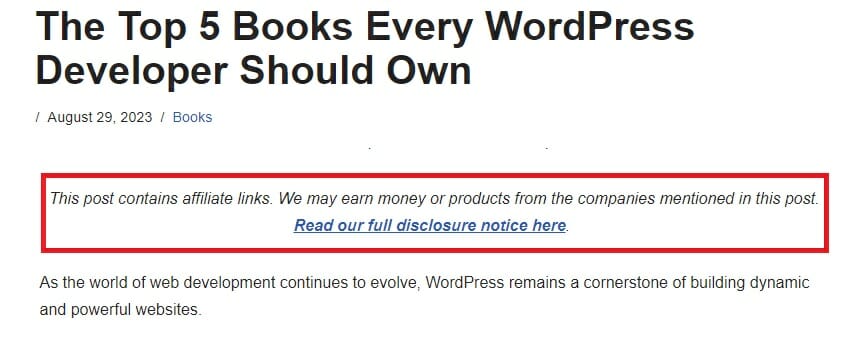
In the step-by-step instructions below, you’ll see that our preferred disclosure runs to just three short sentences:
This post contains affiliate links. We may earn a commission when you purchase products mentioned in this post. View our full affiliate disclosure here.
The last sentence would include a hyperlink to the disclosure page.
Keep in mind that if you’re adding Amazon links to WordPress, the Associate’s program requires you to use the following specific language:
Article Continues Below

“As an Amazon Associate, I earn from qualifying purchases.”
So, if we were to promote Amazon products primarily, we may change our disclaimer to the following:
This post contains affiliate links. As an Amazon Associate, I earn from qualifying purchases. View our full disclosure here.
5 Ways to Add an Affiliate Disclosure to Each WordPress Blog Post
Here are some of the reasons to include affiliate disclosure to the WordPress blogs:
1. Create and Use Custom Synced Patterns
One simple, straightforward way to display a disclosure notice on WordPress without using any plugins or code is to rely on good old-fashioned reusable blocks, which are now called Synced Patterns since the launch of WordPress 6.3.
Whatever you prefer to call them, both terms mean the same thing:
Blocks (or groups of blocks) that you can save, edit, and reuse across different pages and posts in the WordPress block editor. They offer a way to create consistent layouts and elements without duplicating content or manually recreating structures.
The cool thing about synced patterns is that once you create it for your affiliate disclaimer, you never have to make another again! Simply choose it from your list of synced patterns to enter it into a new post.
The downside is that you have to manually add your block pattern to each post, which can soon become tiresome, and run the risk that you may occasionally forget to do it.
If that’s a risk you’re willing to take, let us show you how it’s done.
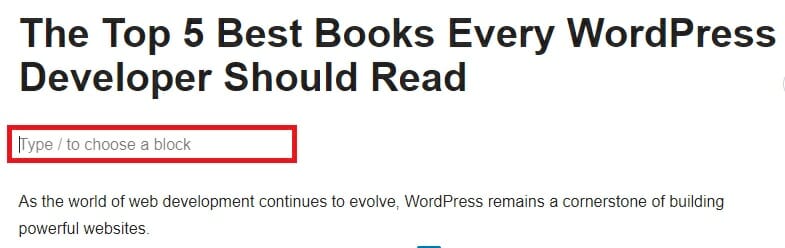
First, open any blog post, and click on the section where the disclosure will go.
As a word of advice, most blogs feature theirs at the top of the post, just below the title but before the content.
This ensures that it’s immediately visible, allowing for greater transparency by being up-front about the nature of your post before readers dive in.
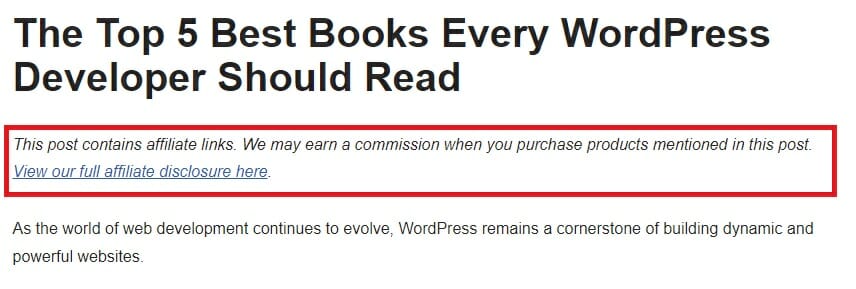
Next, simply paste or type in the short affiliate notice you came up with in the previous section of this guide.
Don’t forget to link to your full disclosure notice page if you decide to create one
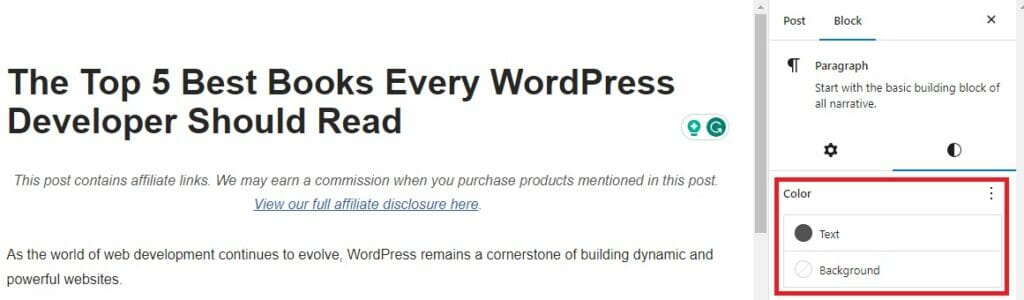
You can then tailor the look of your disclosure statement using the WordPress editor.
Many top affiliate blogs tend to center-align their posts, and make the text a slightly different shade than their primary text. This helps it to stand out without being too distracting from your content.

When you’re happy with your disclosure, click on the dotted horizontal menu at the right of the block menu.
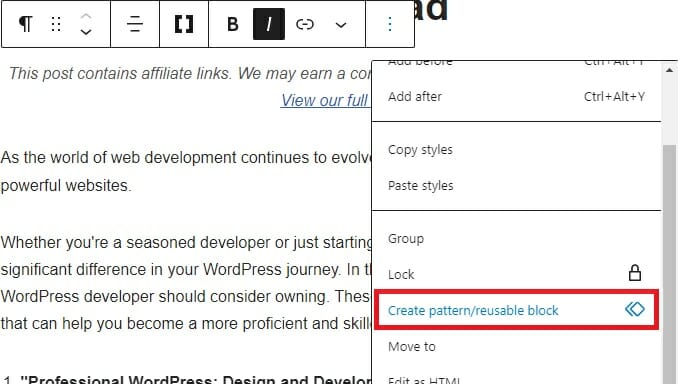
Scroll down until you see Create pattern/reusable block, and click it.
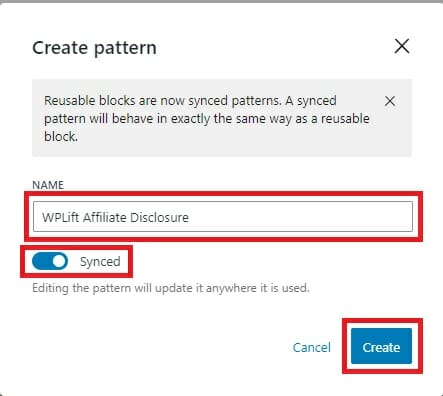
Next, give your pattern a name, and check that the Synced option is enabled. This will ensure that if you later decide to change or update your disclosure, those changes will automatically be reflected on any post where you’ve used that pattern.
Finally, hit Create.

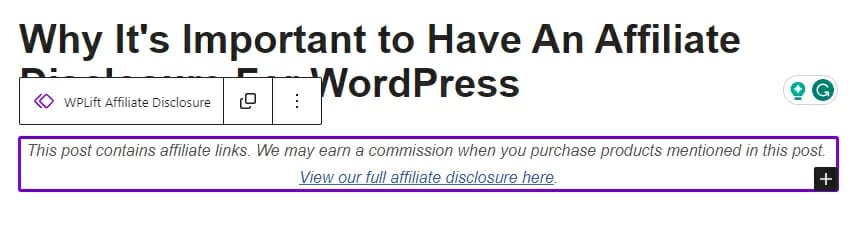
Assuming everything went smoothly, you’ll notice that your block now features the synced pattern icon alongside the name you gave it. At the same time, a confirmation message also appears at the bottom of your post editor.
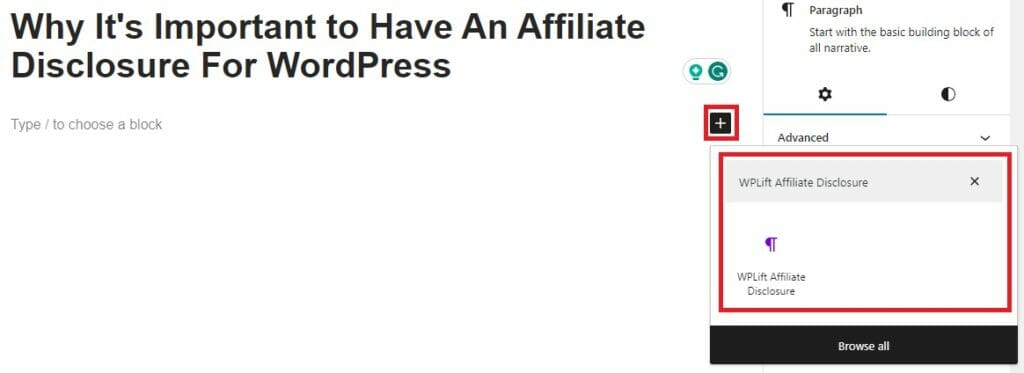
Now, whenever you start a new post, all you need to do is add a new block, search for your synced pattern, and select it.
Voila! You’ve added an affiliate notice to your WordPress blog post, and are ready to start creating that excellent affiliate marketing content.
2. Create a Custom Blog Post Template
Deploying reusable blocks/synced patterns or -as we’ll discuss later- custom shortcodes is a good idea, if you’ll be adding affiliate disclosures sparingly.
That option allows you to use it only as and when needed.
However, if most of your posts are targeted towards making affiliate income, it’s hardly the most efficient or productive approach.
Instead, you may find it better to create a custom blog template with your WordPress affiliate link notice already included.
The downside to this approach is that it takes a little more time, and a few more steps to set up than the other methods mentioned in this guide.
However, by taking a few minutes to create a custom template in advance, you’ll save yourself a lot of time.
Here’s how to do this using the Site Editor tool built-in to WordPress:
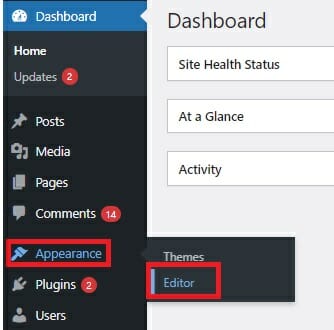
From your WordPress dashboard, go to Appearance – Editor.
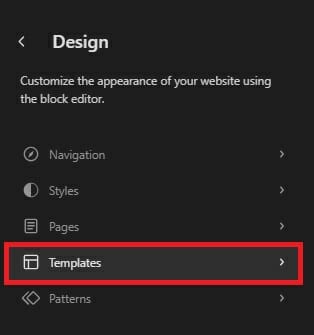
From the design menu, select Templates.
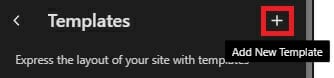
Click the plus (+) icon to create a new custom template.
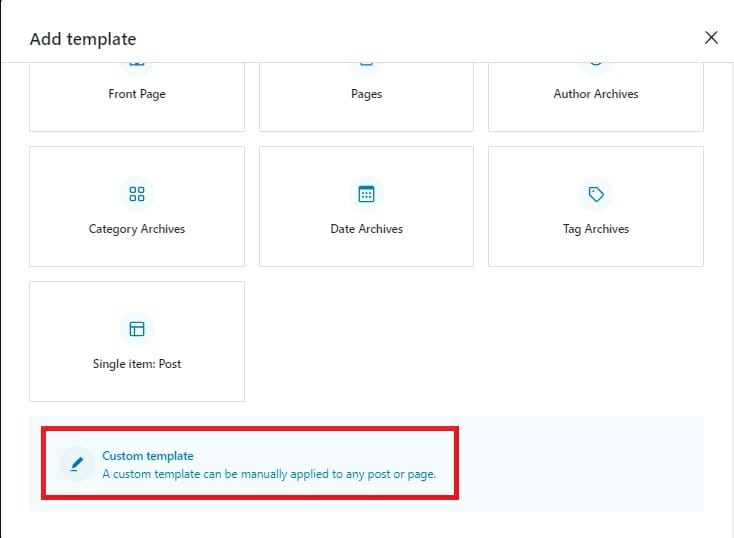
Then, on the next screen, select Custom Template.
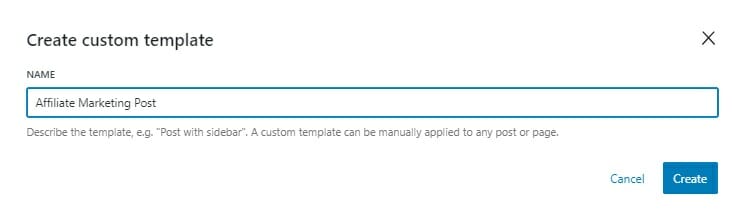
Next, give your custom template a name to help you easily identify it, and click Create.
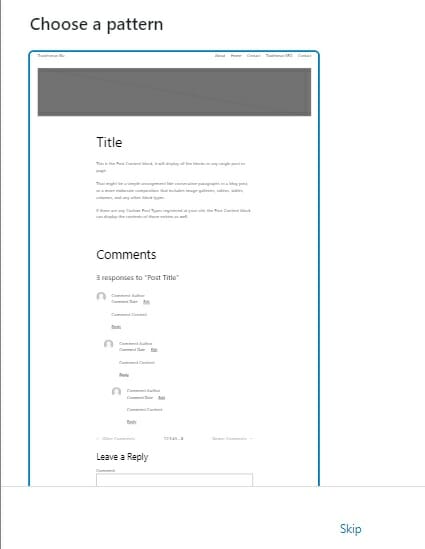
If you’re happy with every other aspect of your current blog post template, you’ll save time using the standard blog pattern. Otherwise, you can start from scratch, and build a full post template to your exact specifications.
For now, we will save some time by selecting that pattern to open it up in the template editor.
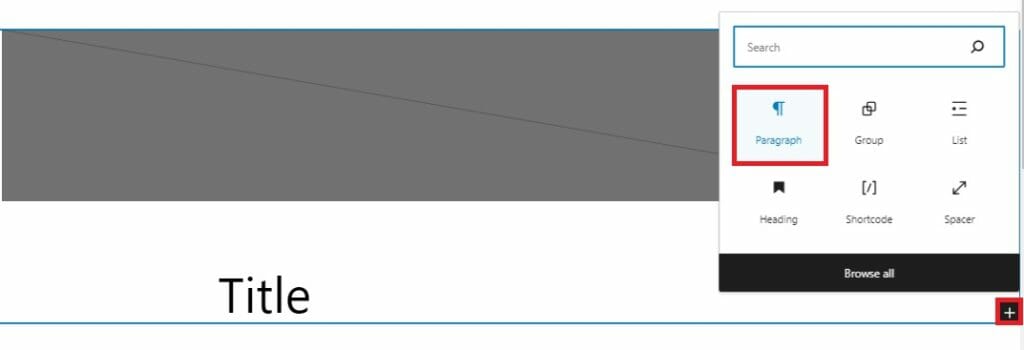
Here, add a Paragraph block for your disclaimer. Again, the best place for this is typically below your title but above your main post content.
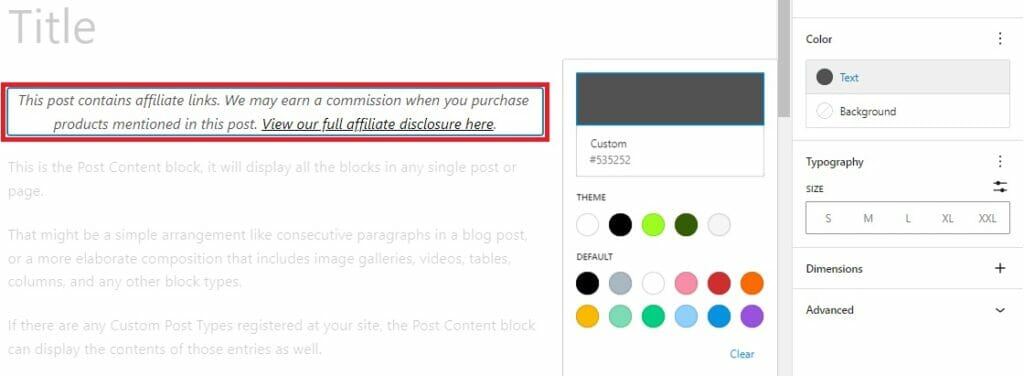
Enter the text for your affiliate notice and use the block styling options to fine-tune its appearance if required.
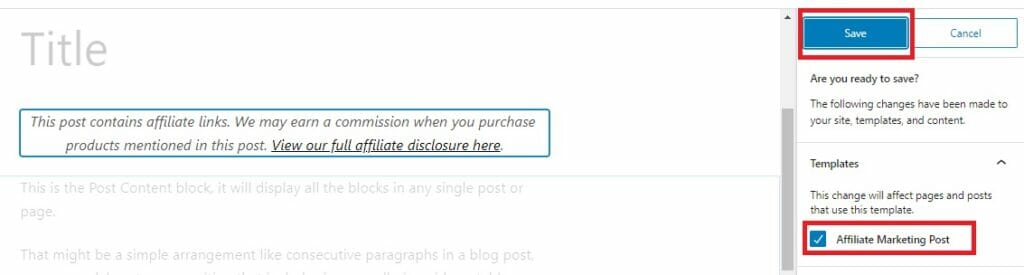
After that, all that’s left is to save your template, confirming that you’re happy that all pages using that template will be affected by your changes.
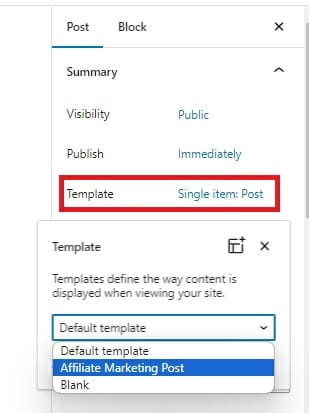
Now, whenever you create a new blog, click on the name of your default template in the Post menu.
Clicking will bring up a drop-down menu from which you can pick your new custom template.
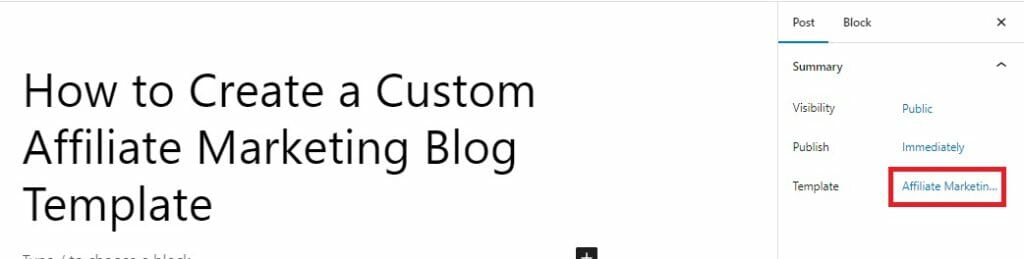
Don’t worry if you don’t see your disclosure in the post editor. All you need is the post summary to show that you’re using your custom template.
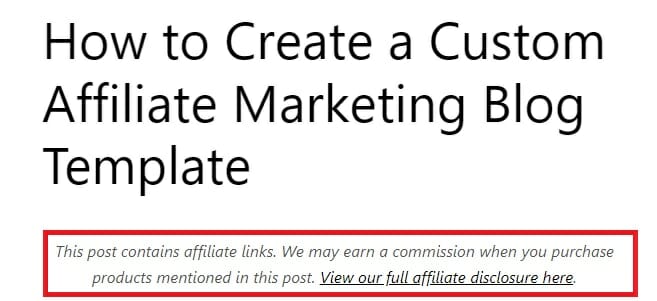
As long as you do that, you’ll find that your disclaimer is displayed as soon as you preview your new post.
Adding a Disclosure Notice To the Default Post Template
If you’re confident that 100% of your blog posts will require a disclaimer, and even selecting a new post template every time is too much hassle, you can always embed your disclosure into your default post template.
First, you need to know what that template is called.
Unless you’ve already changed things, that default template will automatically be displayed in the Post Summary when you start a new blog.
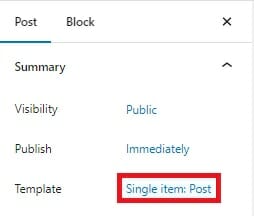
In this example, you’ll see that our default template is called Single item: Post.
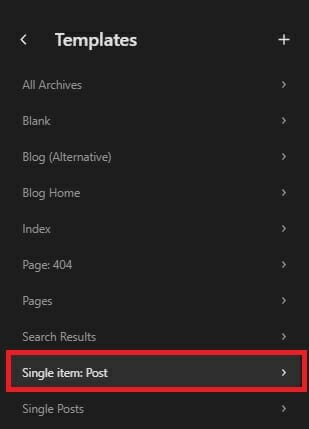
Next, you will find that template in the WordPress site editor by going to Appearance – Editor – Templates and selecting Single item: Post.
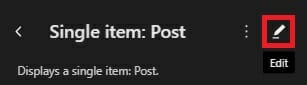
From there, simply click the edit (pencil) icon to open it in the template editor, then follow the instructions above to add an affiliate disclaimer using the paragraph block.
3. Use An Affiliate Disclosure Plugin
As with most WordPress-related things, the easiest way to add fully compliant affiliate notices on your blog posts is to use a plugin.
There’s a wealth of options to choose from here, all of which function in a similar manner. For this guide, we’ll be using WP Affiliate Disclosure.
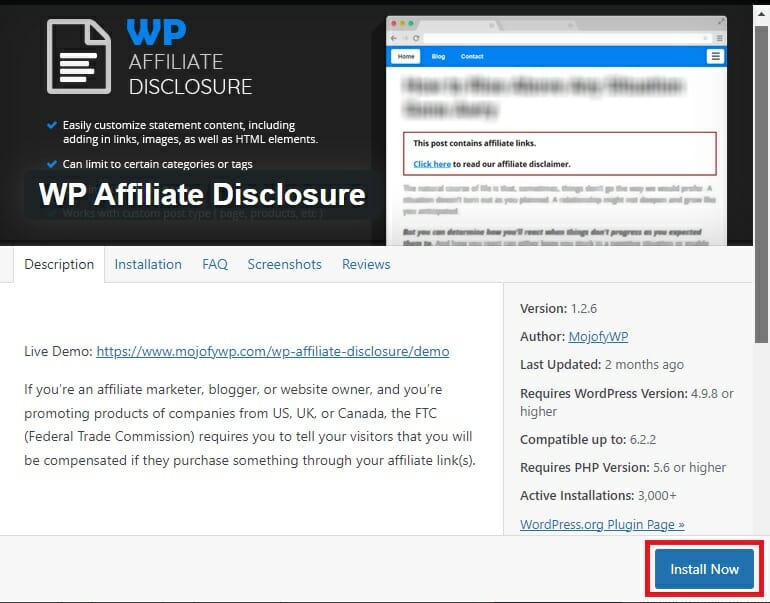
First, download, install, and activate the plugin in the usual manner.
If you’re not sure how to do that, our ultimate beginner’s guide to WordPress plugins has a tutorial you’ll find helpful.

With the plugin activated, select it from the main dashboard menu and click Add New Rule.
‘Rule’ is the name given to the set of options that determine how your disclosure will appear within your content.
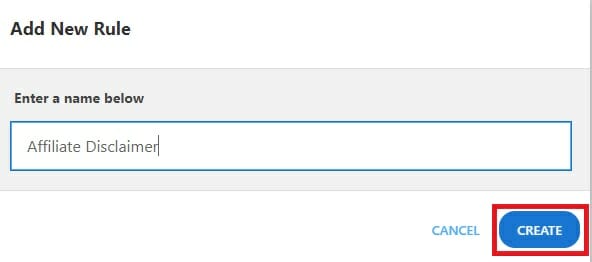
To make one, first, enter a name, and click Create.
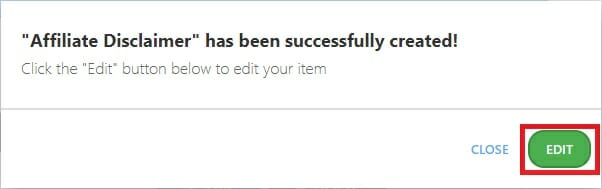
A notification should appear, confirming that your rule was created successfully. You can click the edit button within this notification to change how your disclosure statement looks and functions
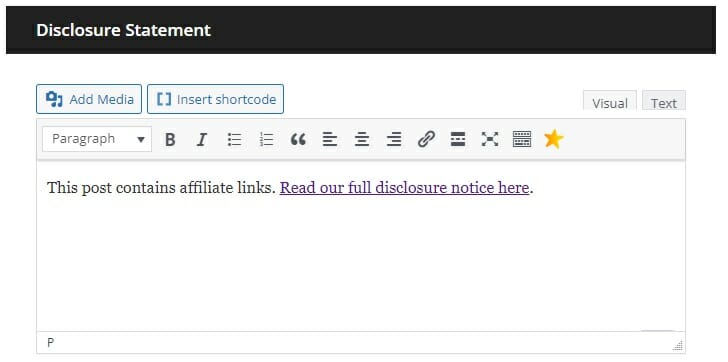
Use the dynamic text editor to alter your disclaimer notice’s content and styling options.
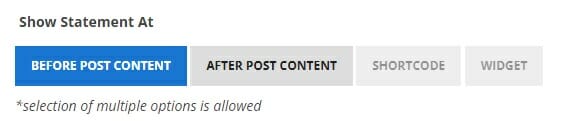
Choose whether you want your statement to appear at the beginning of your post, at the end, or whether you want the ability to insert it on an ad-hoc basis using a shortcode or widget.
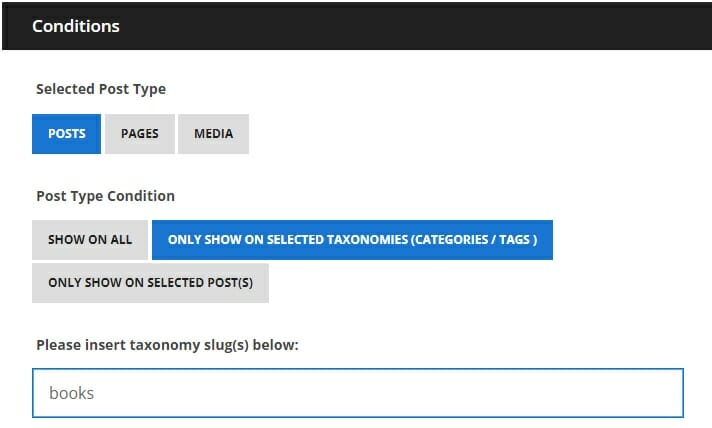
Finally, you can set the conditions which must be met for your notice to appear.
For example, you could set it to appear on only all blog posts, pages, or media files or display your notice only for posts within predefined categories and tags.
Save your work, and the next time you load up a blog post that meets the conditions you set, you should see your new disclosure statement.
4. Create a Custom WordPress Shortcode
Like custom block patterns, shortcodes are an excellent option if you don’t want to be tied to displaying your affiliate disclosures on the same page on every post.
After creating your shortcode, you can insert it wherever you see fit, whether that’s at the top of every post, or after every use of your affiliate links within a single post.
If you’re comfortable tinkering around with your theme’s code, you can simply add a custom affiliate disclaimer by dropping a few lines of code into your functions.php file.
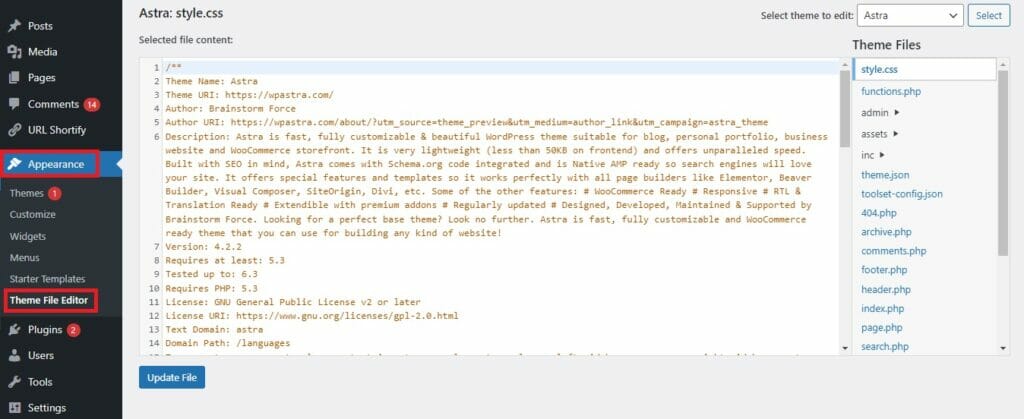
First, login to WordPress and navigate to Appearance – Theme File Editor.
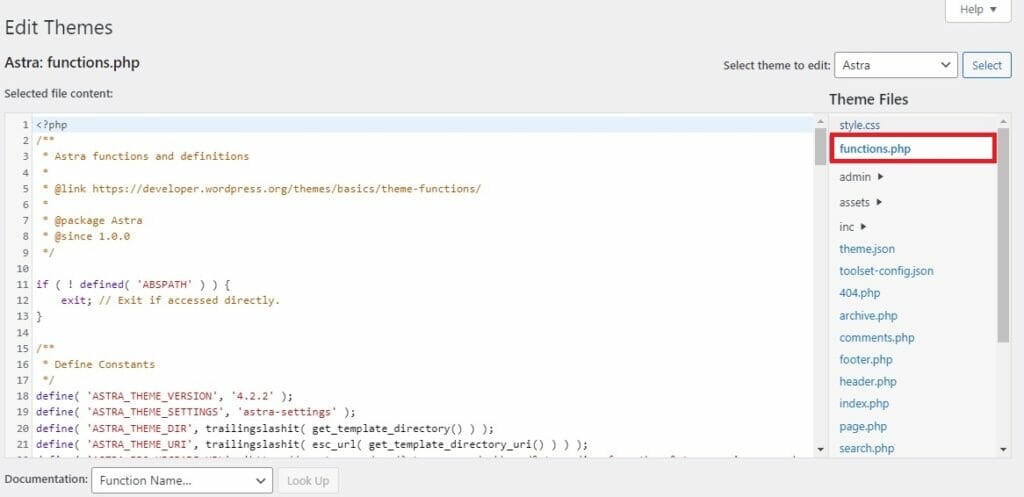
Next, select the functions.php file from the Themes File list.

Then, scroll to the bottom of your file, and paste the following code:
/* Affiliate disclosure shortcode courtesy of WPLift */
function disclosure() {
return “<p class=’disclosure’>This post contains affiliate links. <a href=’HTTPS://WWW.YOURWEBSITE.COM/DISCLAIMER’>View our full affilaite disclosure here.</a>.</p>”;
}
add_shortcode( ‘disclosure’, ‘disclosure’ );
Remember to replace the URL in the href attribute (YOURWEBSITE.COM/DISCLAIMER) with the actual URL of your affiliate disclosure page, and feel free to tweak the two sentences used as anchor text.
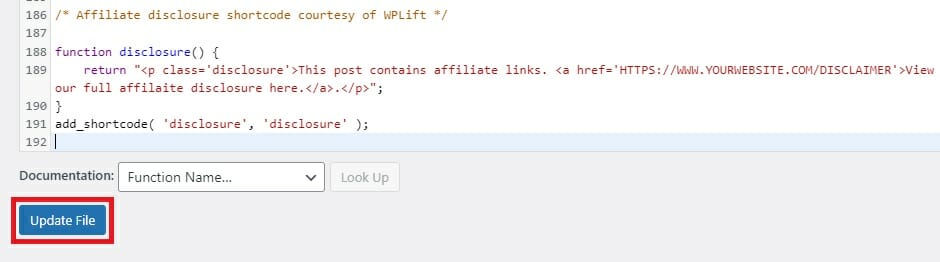
Once that’s done, simply click ‘update file’ to save your changes.
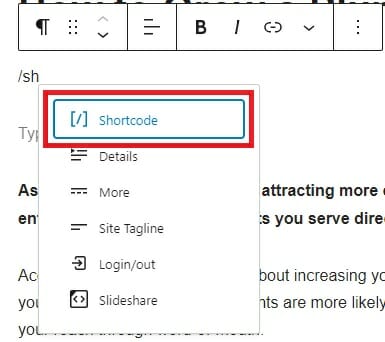
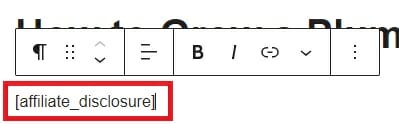
With that complete, any time you want to add your affiliate disclaimer, just add the [disclosure] shortcode to your post by creating a shortcode block.
To use this same process to add other content and functionality to your WordPress site, see our in-depth tutorial on creating custom shortcodes.
5. Add A Shortcode Using a Plugin
If that last step was just too far out of your comfort zone, you can achieve the same result using a plugin.
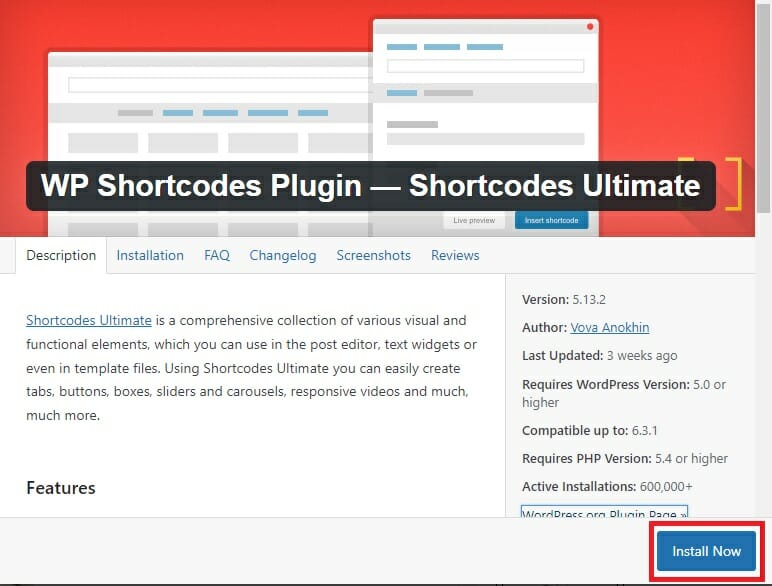
We’ve already rounded up the 9 best custom shortcode plugins for WordPress, so you have plenty of options. However, for this tutorial, we’ll be sticking with our favorite, Shortcodes Ultimate, formerly known as WP Shortcode.
This handy tool is available in free and premium versions, and can be used to add everything from custom layouts to striking CTA (Call to Action) buttons and, yes, affiliate disclosures.
Here’s how it works:
To begin, search for and install the Shortcodes Ultimate plugin. This tool used to be known as WP Shortcodes, so you should be able to find it under either name.
With the plugin activated, head to any blog post if you want to add an affiliate link disclaimer, and ensure that the top toolbar is visible.
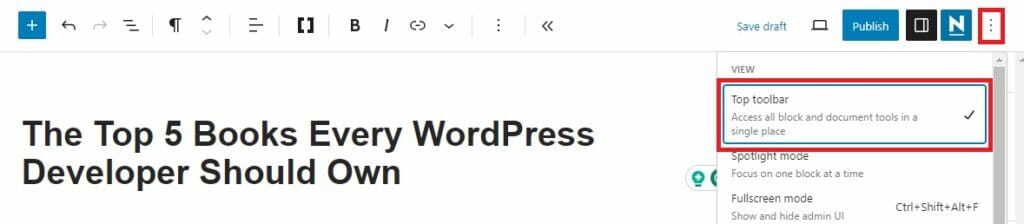
If it isn’t, tap the menu that looks like three horizontal dots in the top right corner, then select ‘Top toolbar‘ from the view options.
Next, click on the section of your post where the disclosure should go before selecting the Ultimate Shortcode icon in the top toolbar.

It’s the one that looks like a set of square parenthesis ‘[ ]‘ sandwiched between the align and formatting options.
Clicking this icon brings up the full menu of Ultimate Shortcode options.

The one best suited for affiliate disclosures is a basic Box shortcode, which is helpful if you want your disclosure to stand out for maximum transparency.
To create one, select Box from the menu and replace the box title with something more helpful and descriptive, such as “affiliate disclosure.”

Moving down to the shortcode customization options, you can choose from a range of styles for your box.
We prefer the default setting to create a professional, modern look for our blog, but the other style options may suit your liking.
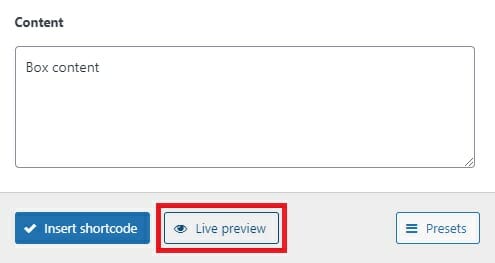
You can always experiment to see how each style will look by tapping the Live Preview button at the bottom of the customization box.
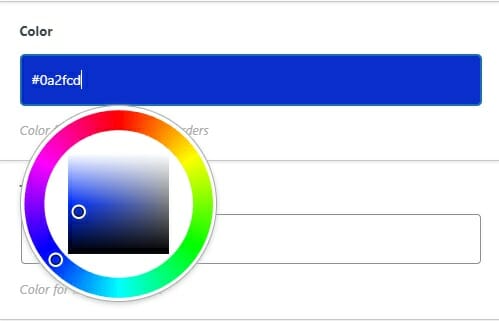
You can also change the color of your box’s title, tweak the design using custom CSS, and enter the text for your WordPress affiliate disclaimer in the content field.

Keep in mind that this field doesn’t have any text formatting options, so you’ll need to manually create your hyperlink by using the following code:
<a href=”https://yourwebsite.com/disclosure” target=”_blank”>Read our full affiliate disclosure here.</a>
Again, just be sure to replace the URL with the actual link to your disclosure, and change the anchor text to something that suits your brand.
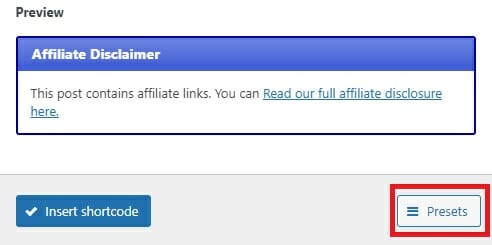
Before you insert your shortcode, click the Presets button in the bottom right corner.

Tap ‘Save current settings as preset’, and give your presetting a name.
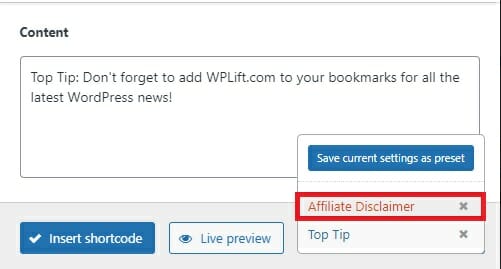
By default, the last settings you entered into the box formatting options will be automatically displayed the next time you go to load a new box.
This is fine if you’re only using it to add disclaimers, but if you want to use the box shortcode for other purposes, saving your disclaimer as a preset will allow you to load it for future use quickly.
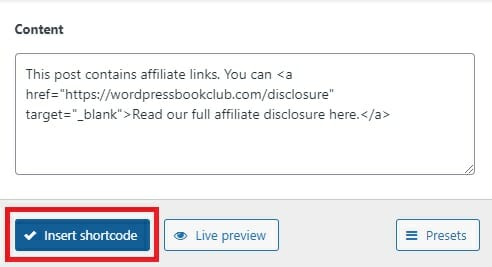
Finally, click Insert Shortcode.
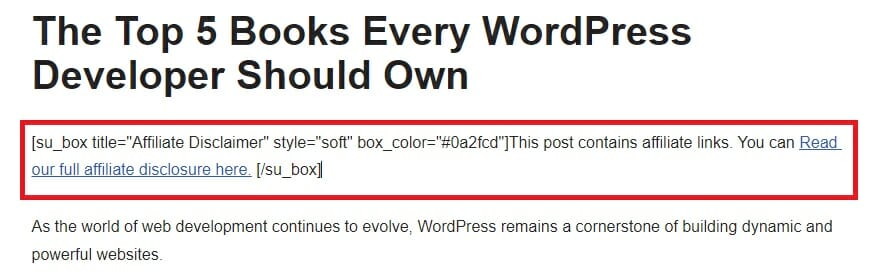
Don’t worry if your generated code looks a bit complicated as ours does here.
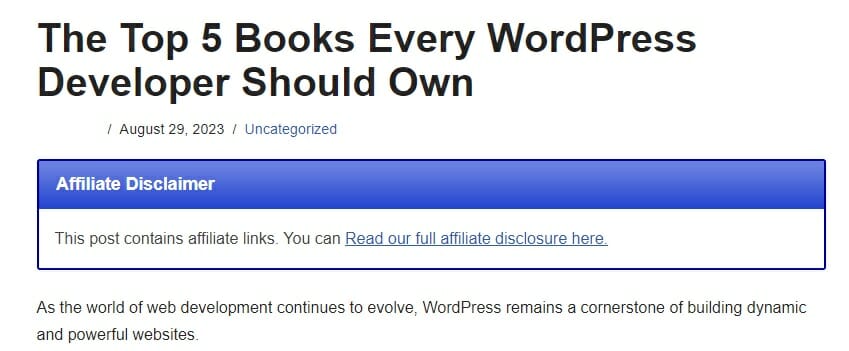
Once you preview or publish your site, you’ll find that disclosure about your affiliate links looks exactly as intended.
What is the Best Method for Adding Affiliate Disclosures to Every WordPress Blog Post?
By now, you’ve learned multiple ways to automatically add pre-made disclosure notices to your affiliate blogs, some relatively simple, some a little more complicated.
In doing so, our goal was to help you find the one method that works best for you, but if you’re still not sure which one to try, let’s wrap up with a few final suggestions.
- Adding an affiliate notice to your blog template – This approach is the best method if all (or at least) most of your blog posts contain affiliate links. It takes a little longer to set up than other methods but saves the most time as your disclosure will automatically be included in every post without you having to do anything.
- Using shortcodes – This is a good option if you want the ability to add a disclosure notice in different places or only on select posts. It also gives you more freedom with the look and feel of your disclosures. However, it either requires you to edit code or use a plugin such as Shortcodes Ultimate, which could have some impact on your site performance.
- Creating a synced pattern – Formerly called “reusable blocks,” synced patterns also allow you to pick and choose where your disclosure appears, and are by far the easiest option in terms of initial set-up. On the downside, you won’t have as many styling options as with a plugin.
For more tools to help turbocharge your affiliate marketing success, check out our review of the top affiliate plugin, ThirstyAffilaites.