WPLift is supported by its audience. When you purchase through links on our site, we may earn an affiliate commission.
Kinsta Free Static Site Hosting Review
Have you just found how cool static sites are? They are made using HTML, CSS, and JavaScript and don’t require any database. Hence, they load super fast and are secure. Perfect for websites where content doesn’t change often. To create a static website, you can use Kinsta’s site hosting, as it offers modern features. To know more, check out the various features of Kinsta Hosting and know how it can help you make a free static site.
Kinsta’s Free Static Site Hosting is a solid choice for these sites. It uses Cloudflare’s network, so your site loads quickly from anywhere. Plus, Kinsta makes things easy by handling the deploying of your site for you.
In this post, I’m going to walk you through setting up a static site on Kinsta. We’ll look at how to get your site ready, hook it up with Kinsta, and push it live.
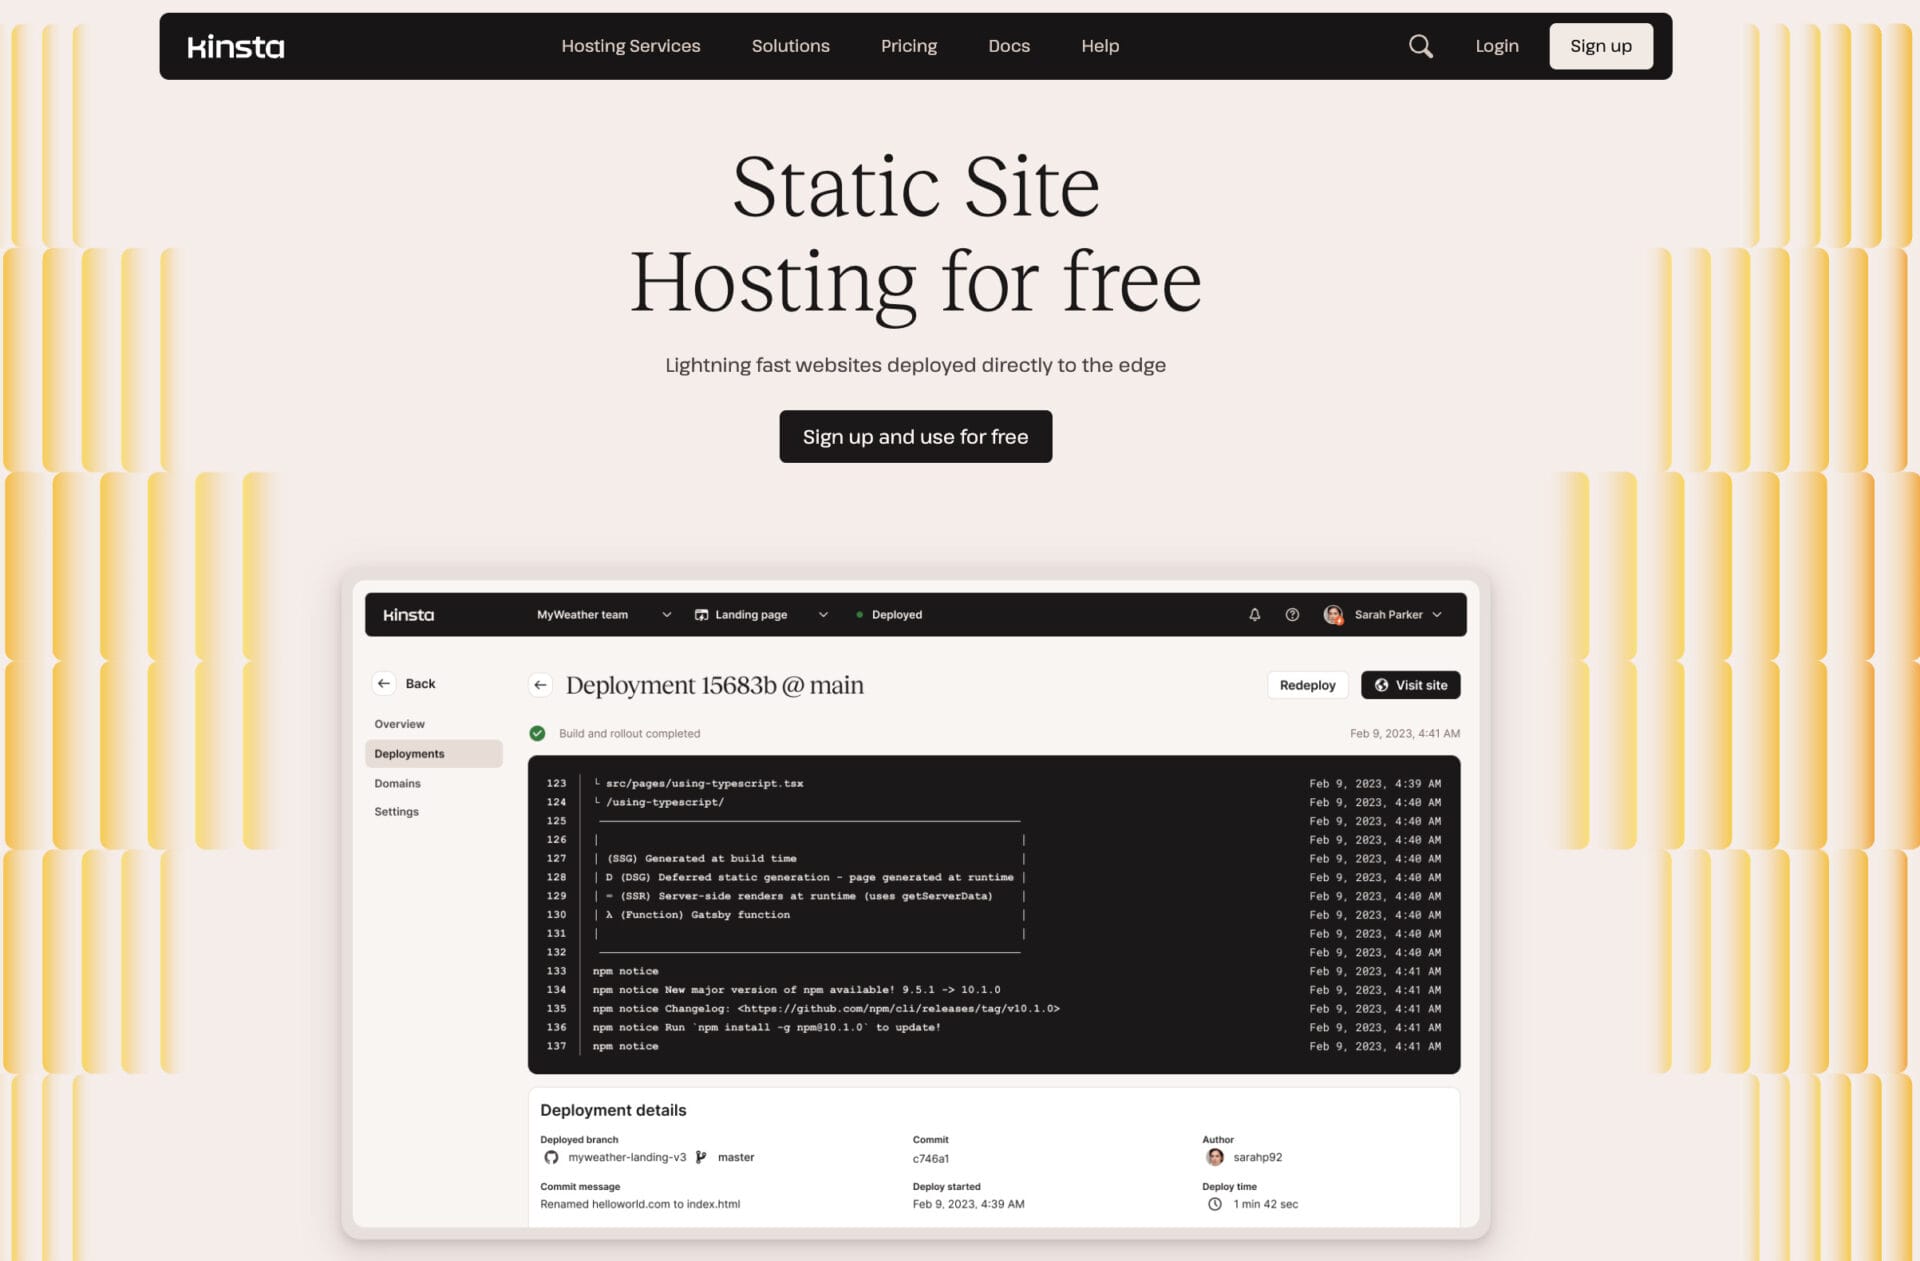
Kinsta Static Site Hosting: Overview and Key Features
Kinsta recently offered Static Site Hosting to everyone. It’s a service specially designed for those who need to host HTML pages and assets quickly and efficiently. The best part? Kinsta can push your static site project across Cloudflare’s extensive network of over 260 locations —and it’s completely free.
Features include:
- Simple deployment of HTML, CSS, and JavaScript sites.
- Integration with GitHub, GitLab, or Bitbucket for easy updates.
- Robust security through Cloudflare, plus free SSL certificates.
- An API for streamlined site management.
- Options for adding dynamic elements to your static site.
And resources are as follows:
- 1 concurrent build per site
- 100 static sites per business
- 600 build minutes each month per business
- 100 GB monthly bandwidth per business
- 1 GB build image size per site
Hosting Your Static Site on Kinsta
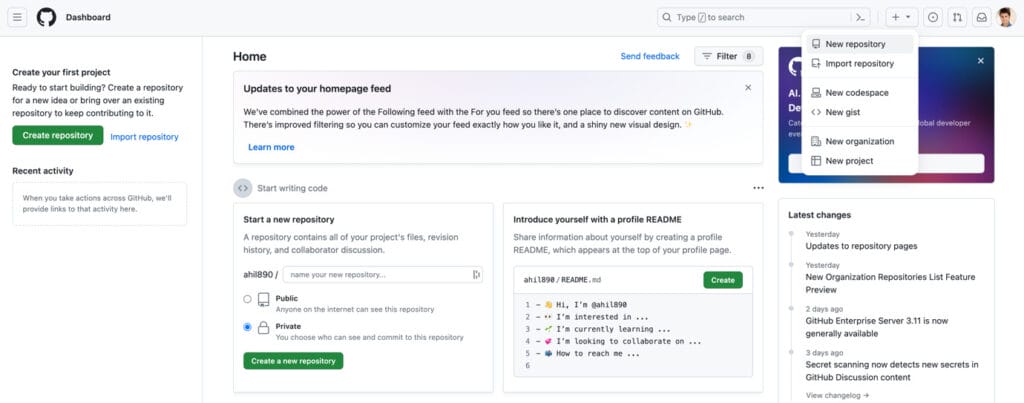
To host a static site on Kinsta, you first need to create a repository on GitHub. If you don’t have a GitHub account, it’s free to create one.
Log into GitHub and click the + button. Then, choose Create New Repository from the dropdown menu.
Kinsta even offers a wide collection of template repositories on GitHub, you can understand these repositories and use them for deployment.
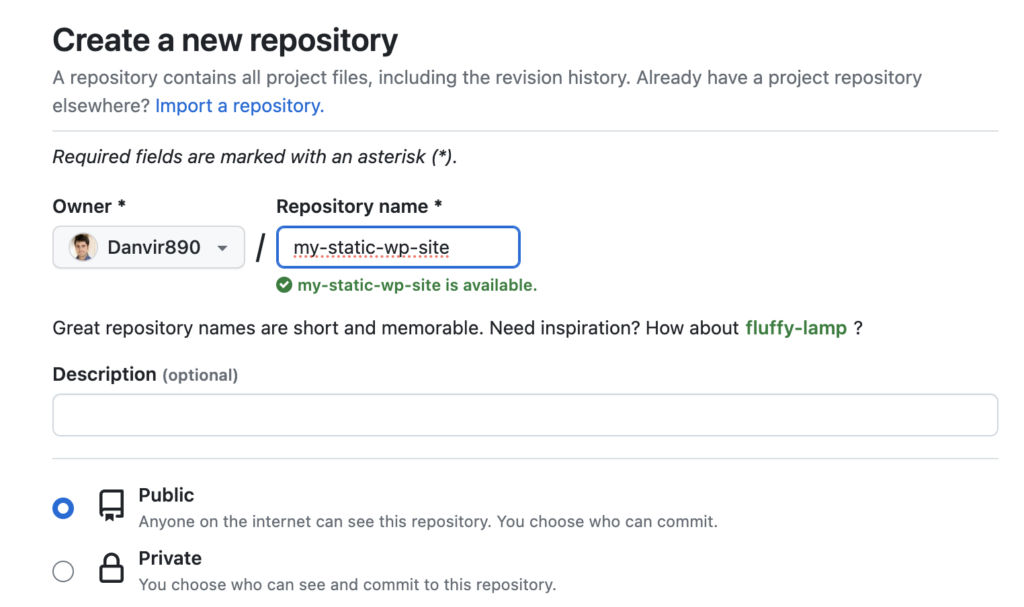
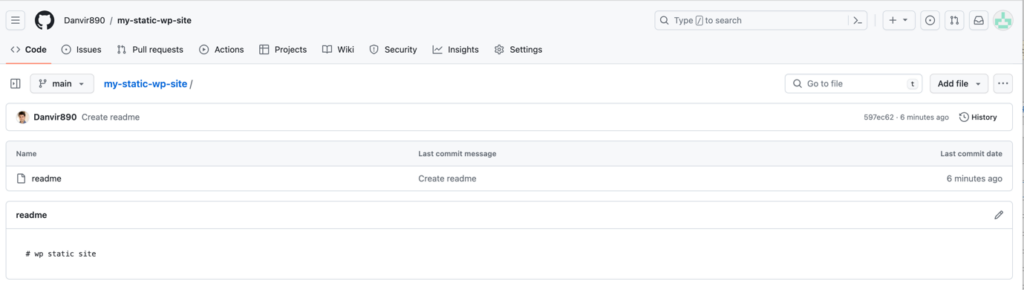
Give the repository a relevant name, like “my-static-wp-site.” You can leave the description blank and set it to public for easier access.
After your repository is up, create a new file to set up the main branch for your repository. You can name the file something write “readme” and write “# wp static site” in the HTML editor. Then click Commit changes and GitHub will create a main branch for your repo.
Now, it’s time to link the repository with Kinsta’s static site hosting.
Go to your Kinsta dashboard and navigate to the Static Sites section.
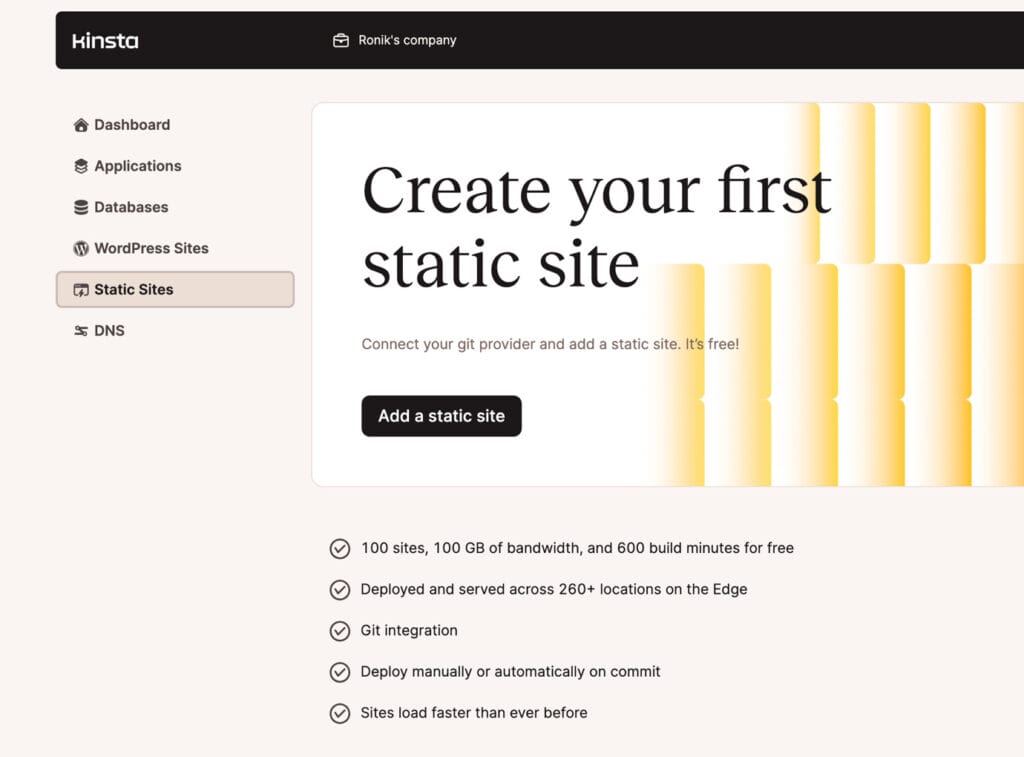
Then click the Add a static site button to connect your GitHub account to Kinsta.
You’ll need to edit permissions in GitHub to enable Kinsta to fetch your repository. Once done, select the repository you just created and enable automatic deployment on commit.
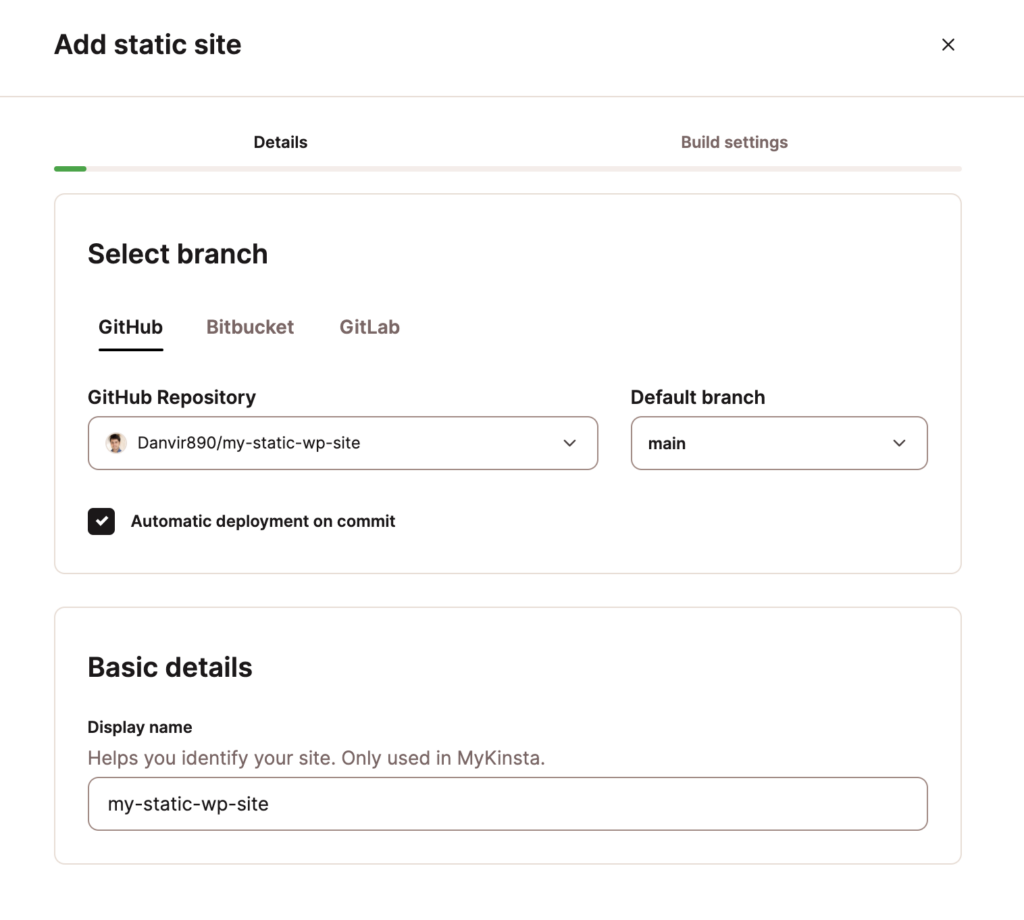
Then click Continue. This will take you to the Build Settings fields, all of which you can leave blank. Now click Create site to proceed.
Kinsta will now create a site, with the process taking about 30 seconds. Once done, you will see a success prompt and the following screen:
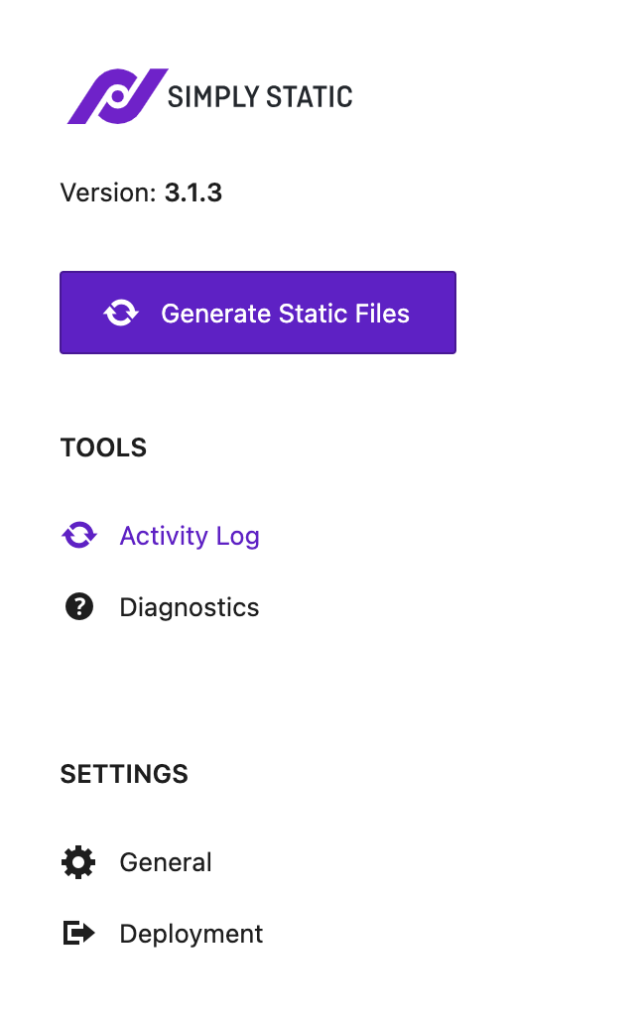
Now, you have to convert your WordPress site into a static website. For this, I recommend using the Simply Static plugin but you can also follow this step-by-step guide.
Go to Simply Static’s Settings and choose Local Directory as the deployment method and set the local folder where you want to keep the static copy of your site.
Then click Generate Static Files to create a static website.
After some minutes, all your static files will appear in the folder you chose in the step earlier.
Now on your computer, open a Powershell or Terminal, head to the folder with the static files, and write the following commands:
git init
git remote add origin https://github.com/{username}/{repository_name}.git
git add .
git commit -m “static content”
git branch -M main
git push –force -u origin main
And that’s it. These commands will connect the repository you created earlier and push all the static files to GitHub. Since you already connected the repository with Kinsta’s Static Site Hosting, the push will trigger an automatic deployment of your site.
Now you can click the Visit Site button in the Kinsta Static Sites section to view your static site.

You’ll also want to add your domain since you’re assigned a temporary one after the deployment completes. To map the static site to your custom domain, head over to Domains > Add domain. You can then use it as the primary domain for your static website.
Final Verdict
There you have it–your static site is live on Kinsta! Just add your domain, and you’re good to go.
The best part? You won’t have to sweat over maintenance or security issues.
With Kinsta’s static hosting and the Simply Static plugin, creating and running a WordPress website is totally doable and stress-free.