WPLift is supported by its audience. When you purchase through links on our site, we may earn an affiliate commission.
AccessAlly Pro Review: An All-In-One WordPress Course Creation Tool
AccessAlly is a WordPress plugin that helps you create online courses and membership sites. It’s used by businesses and solopreneurs in a variety of niches. And in our AccessAlly Pro review, you’ll get a detailed look at how this tool works and whether or not it’s the right solution for you.
There’s a lot of functionality to cover, so I’m going to skip the lengthy intro and jump right in!
I’ll start with a general look at the tool’s features to give you an idea of what it has to offer. Then, I’ll go hands-on with it on my own WordPress site to show you how everything works.
AccessAlly Pro Review: What This Duo Does
AccessAlly Pro aims to be an all-in-one plugin solution to help you create courses and membership sites. Beyond that, it can host searchable public or private user directories, and act as a portal for clients.
That is, rather than having to, say, integrate a membership plugin with WooCommerce to handle payments and subscriptions, AccessAlly Pro lets you do everything, without the need to cobble together various third-party extensions.
Beyond that, AccessAlly Pro works with any WordPress theme, so you can integrate it into your existing site and design.
AccessAlly Pro is actually a package of two plugins:
- AccessAlly – focuses on course creation, payments, member directories, and basic gamification. This is the tool that creates your raw courses.
- ProgressAlly – adds full learning management system functionality on top of those courses. For example, you can offer quizzes, assign homework, offer certificates, etc.
This is an AccessAlly Pro review, which means that I’ll look at both tools (more on the pricing later on).
While there are tons of smaller features, here’s what AccessAlly Pro handles at a high level.
Course Creation and Management
- Unlimited courses – create as many courses as you need, including both instant and dripped content.
- Team accounts – sell bulk course access to businesses and other organizations.
- Progress tracking – offer checklists, progress bars, charts, etc. to help keep people motivated and on track.
- Gamification – offer points for certain achievements. You can even let users “spend” their points to unlock bonus content, which is pretty unique.
- Video content – create video bookmarks and track how much of a video your course-takers watch.
- Quizzes – create three different quiz types. You can even tag users based on their quiz results to segment them.
- Homework submission – including an option to give private feedback to students.
- Course certificates – offer a custom certificate to people who complete your course.
Payments, Forms, and Marketing
- Payment processing – accept payments via Stripe or PayPal in multiple currencies including subscription payments. You can also automatically apply any relevant taxes/fees.
- Built-in payment forms – no complex process to start selling. Plus, the forms are mobile-friendly by default.
- Cart abandonment – the 3-step checkout process lets you capture email addresses early on and follow up if someone doesn’t finish their order.
- Free/cheap trials – offer a free or paid trial period to help get people in the door.
- One-click upsells – make it super easy for people to upgrade with one-click upsells and order bumps.
- Coupons/discounts – offer unique, time sensitive coupons and discounts to attract sales.
- Cross-sells – create cross-selling dashboards to introduce people to your other products and make it easy for them to upgrade.
- Built-in affiliate program – start recruiting affiliates to promote your courses without the need for an external tool.
Analytics, Automation, and Administration
- Marketing automation – you can use members’ actions to trigger a tag-automated sequence. Trigger by login, page visits, video watching, quizzes, etc. Tags are built into pretty much everything in AccessAlly.
- Activity tracking – see where members spend the most time, and where they get stuck.
- Custom metrics dashboard – create your own custom dashboard to track key metrics, like sales, churn rate, cart abandonment rate, refunds, etc.
- CRM integrations – integrate with popular CRMs, including InfusionSoft/Keap, Drip, ConvertKit, ActiveCampaign, and Ontraport.
- Member-specific countdowns – create special countdown timers that are unique for each member.
- Split-testing – use tag-based split testing to find out what works (and what doesn’t).
- User management – one spot to manage members, issue refunds, pause subscriptions, etc.
Hands-on With AccessAlly Pro
Now that you have a good idea of the features, let’s go hands-on with AccessAlly Pro…

Article Continues Below
Setting Up The Basics
To set up the basics for your site, AccessAlly gives you a convenient wizard that takes you through the core settings, which makes it easy to get started:
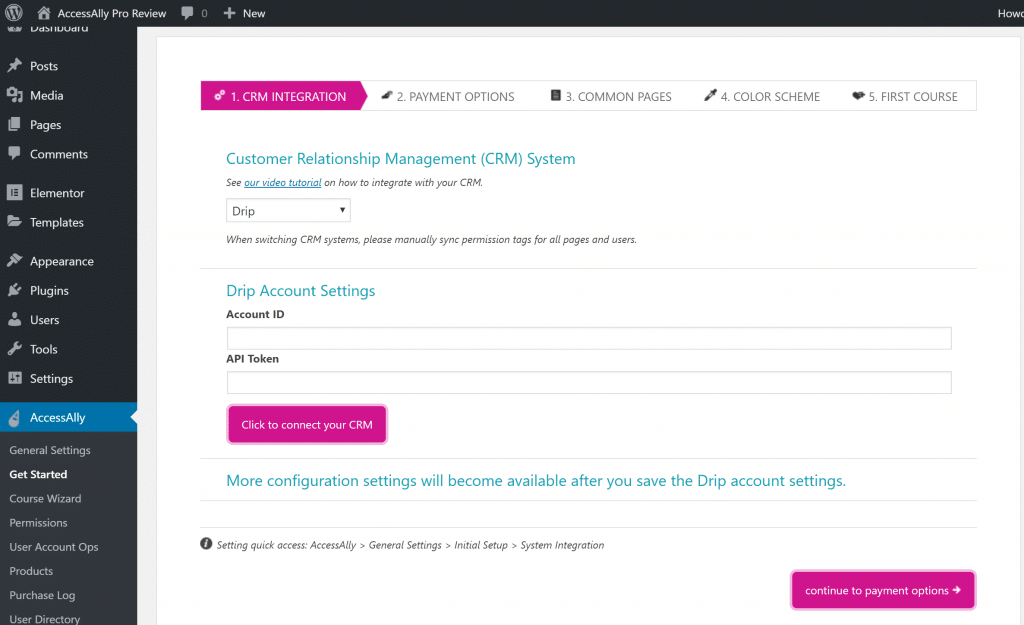
It will cover:
- Connecting to your CRM and choosing what member information to pass to your CRM
- Payment processing
- Creating core WordPress pages
- Basic color schemes for your AccessAlly content (your WordPress theme will control everything else)
Once you finish that, you’re ready to create your first course. But first…
Explaining The Concept Of Tags
Before I show you how to create a course with AccessAlly, I think it’s important to quickly define a term you’ll see a lot – tag.
AccessAlly uses your chosen CRM’s tags to manage access to courses and automate all sorts of actions at your site.
In total, AccessAlly uses three types of tags:
- Access tags – these control whether or not a user can view certain content, like a course.
- Identity tags – these identify groups of users. For example, you could create a special tag for members of a Certified Partner program.
- Trigger tags – these are the most versatile. You use them to start/stop automation. For example, you could create trigger tags for purchases or refunds.
Most of the time, AccessAlly will automatically create tags for you, so it’s not like this is something you need to manually set up for every course/action.
You’ll see these tags in action as I show you how the course setup wizard works…
Creating A Course
To help you create your courses, AccessAlly includes a course creation wizard.
Article Continues Below

When you get started with the wizard, you’ll first choose whether you want to create a:
- Stand-alone course – course-takers get access to all of the content from day one.
- Stage-released course – course-takers get access to new content over time (aka dripping)
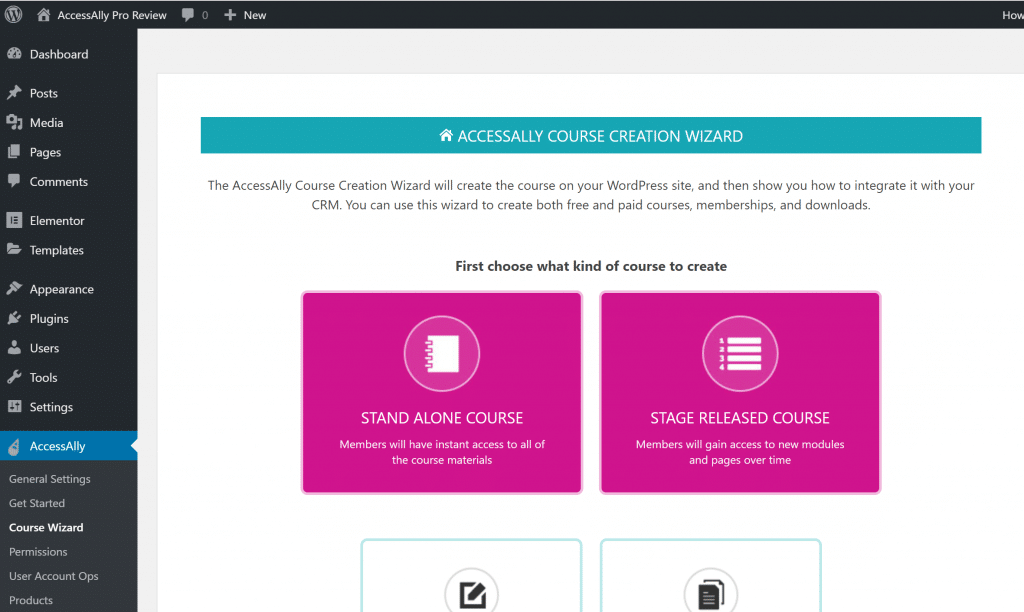
If you’ve already created a course, you can clone that course to save time.
Also, I’ll create a drip-fed course for this example…
Next, you’ll enter some basic details, like its name and such:
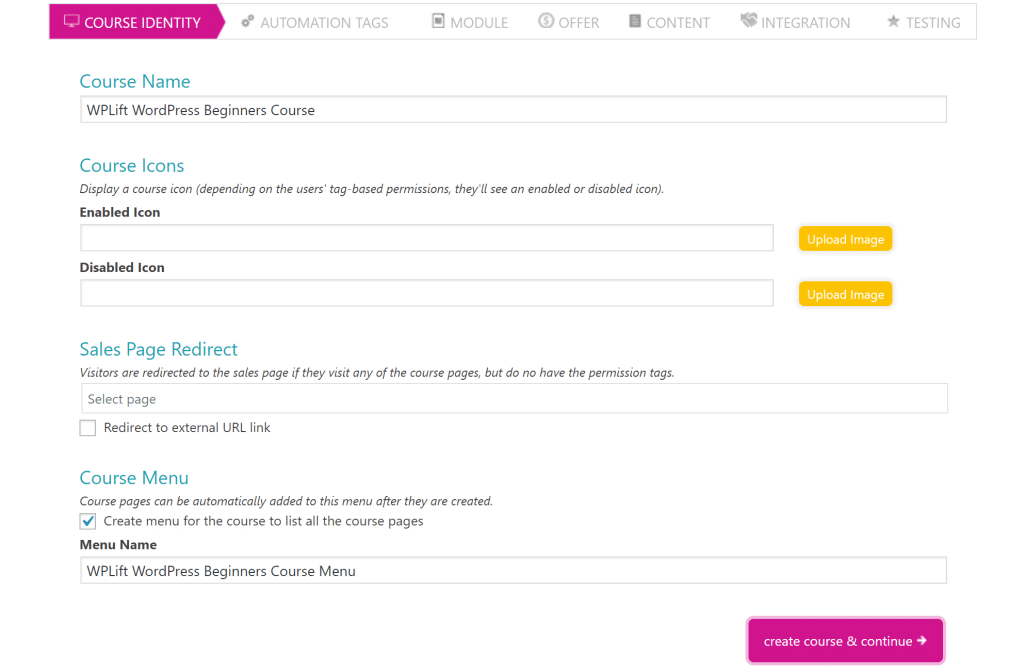
On the next page, AccessAlly will automatically generate tags for you, though you can edit them if desired.
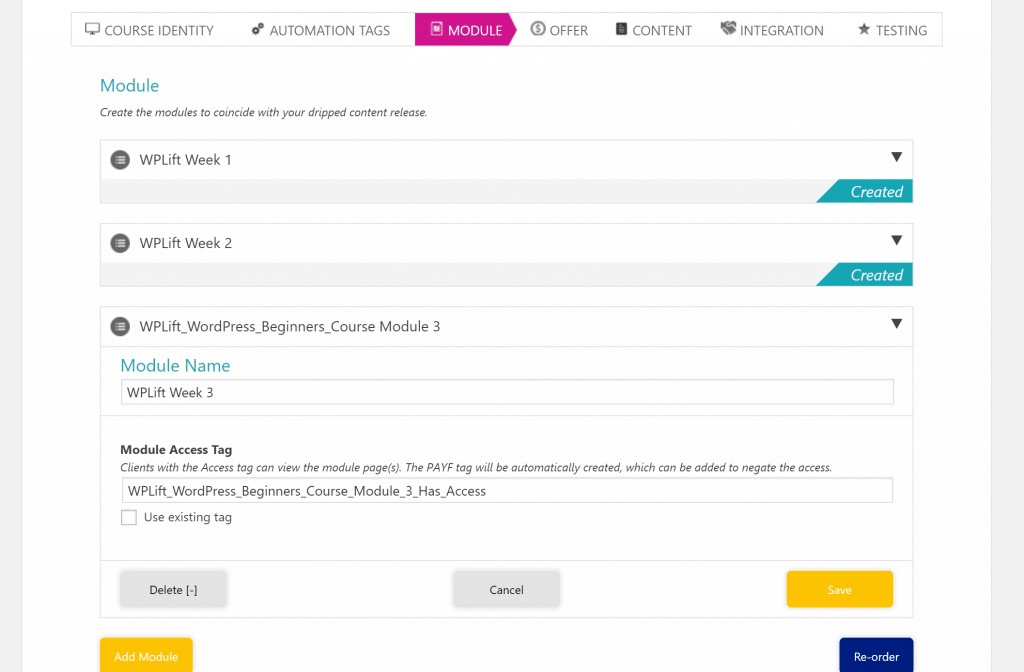
Then, you can set up your course Modules. For a drip-fed course, each module is a set of timed-release content. Each module also gets its own access tag:
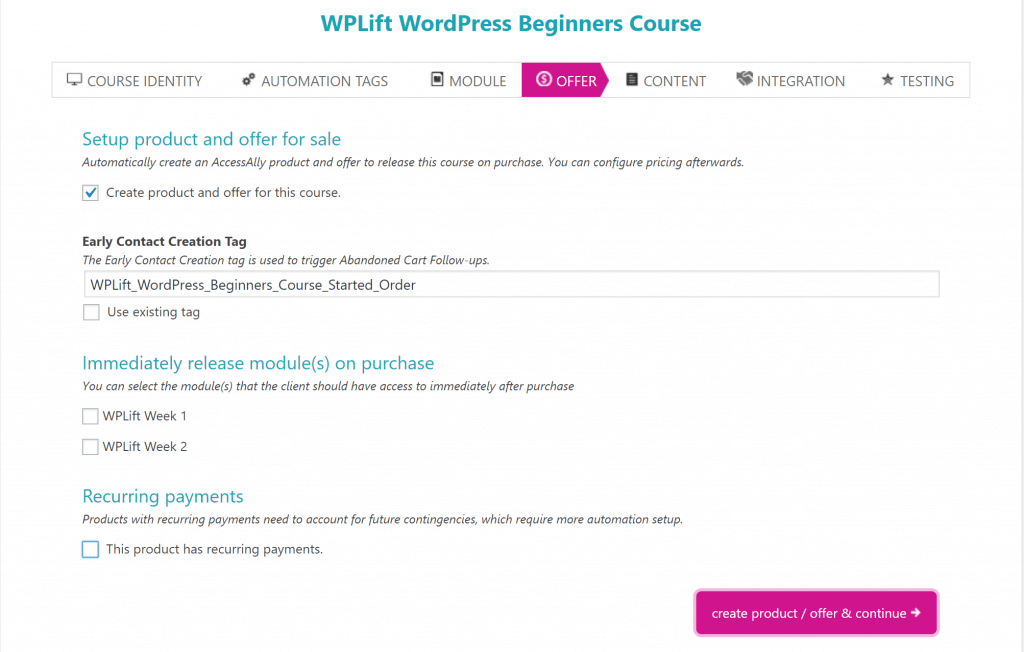
After that, AccessAlly can automatically create an “offer” to let people purchase the course (and unlock the course when purchased).
Article Continues Below

You can also choose which modules to unlock right away and whether or not the course has recurring payments (if so, AccessAlly will add another tag for those payments):
Then, you can actually add your course content. For each piece of content that you add, AccessAlly will create a new restricted post or page that you can go edit later:
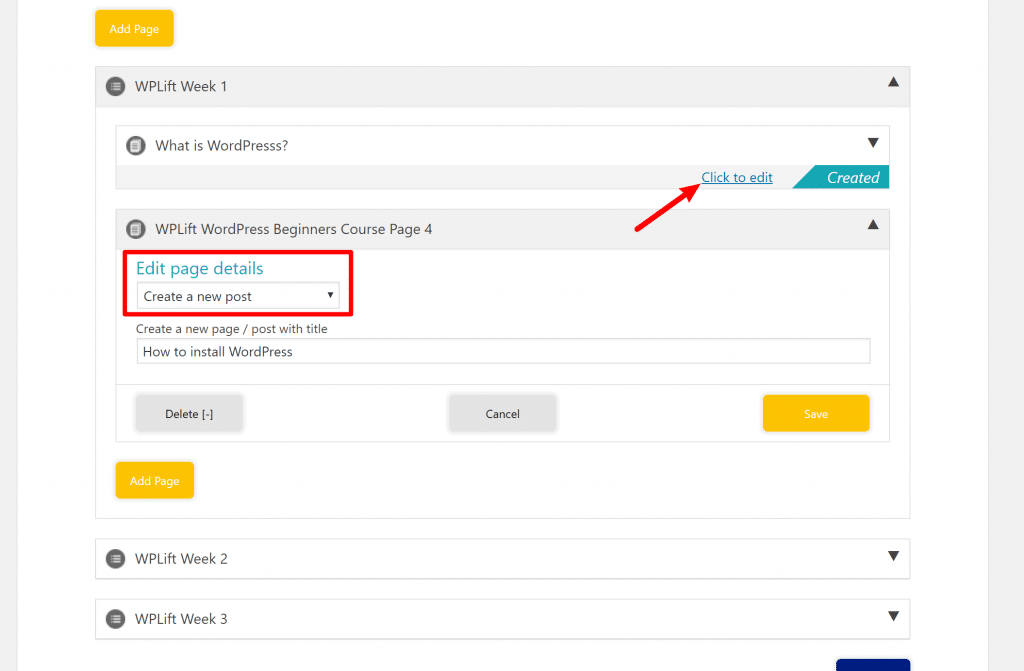
You can then click to edit that post/page in the normal WordPress editor. More on this in a second.
Finally, the last page helps you integrate your course’s automation into your chosen CRM software (ConvertKit, in my example).
Though AccessAlly will help you do this by providing detailed instructions, you’ll still need to manually set it up in your CRM, which is a little tedious. You can see an example of the instructions below:

Then, AccessAlly will help you test everything and you’re ready to go!
Creating Individual Course Posts/Pages
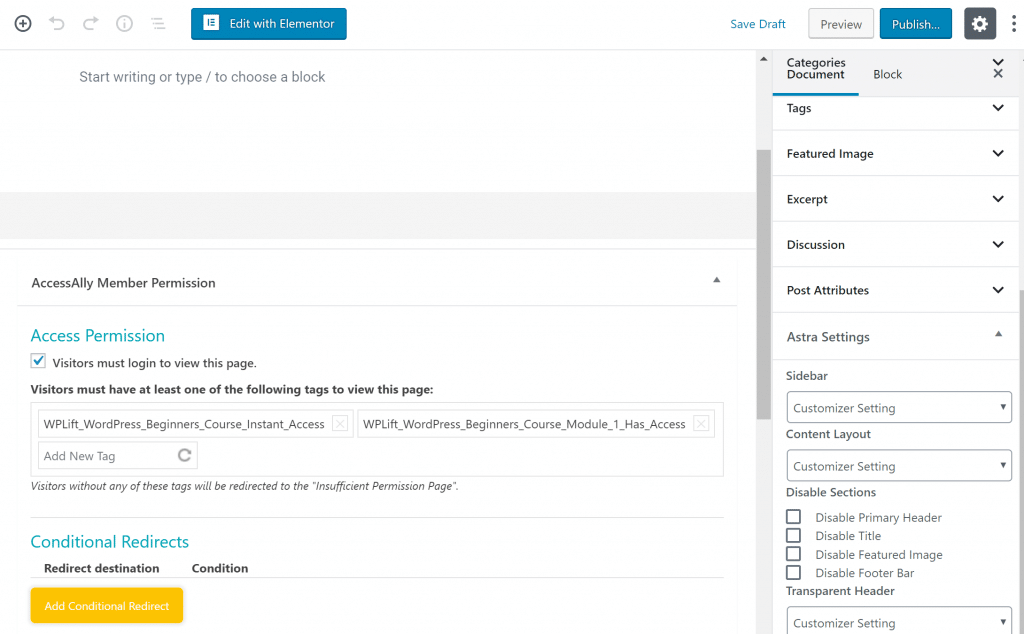
When you’re editing an individual post/page for a course, you’ll use the regular WordPress editor…but with the addition of new AccessAlly Member Permission and ProgressAlly Page Settings metaboxes.
The first box lets you control access (AccessAlly fills this out automatically, but you can edit it if desired using the tag system):
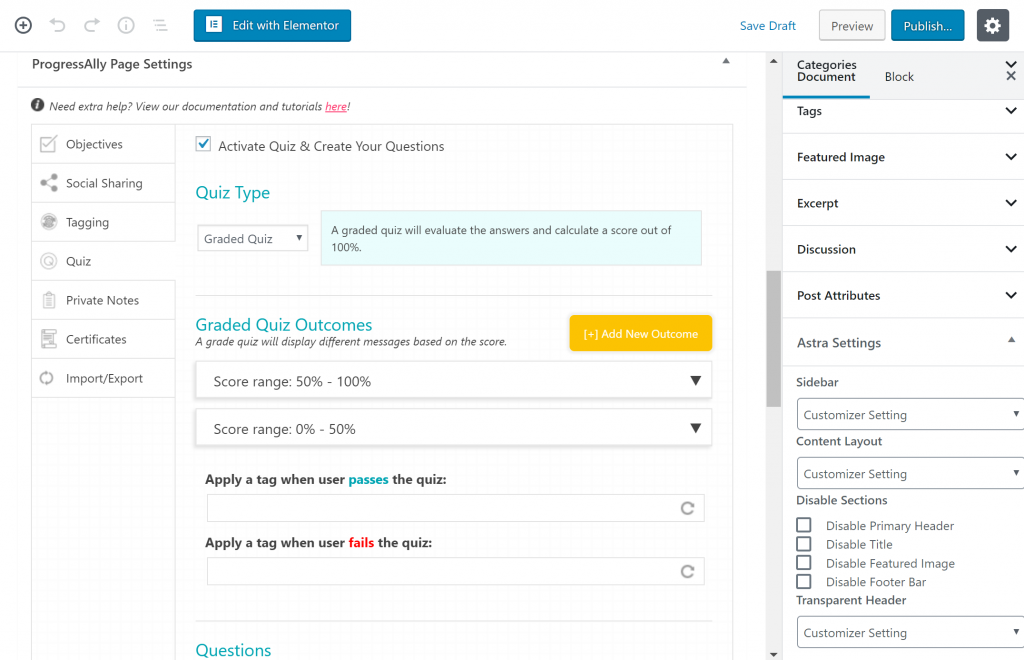
Then, the ProgressAlly box lets you set up:
- Course objectives
- Social sharing
- Tags for completing objectives
- Quizzes
- Private notes
- Certificates
For example, the Quiz tab lets you actually build your quiz and set up the associated tagging:
A Rapid-Fire Look At Some Of The Other Features
At this point, you should have a solid idea of how the basic course functionality works in AccessAlly.
To finish out my AccessAlly Pro review, I want to give you a rapid-fire look at some of the other neat features.
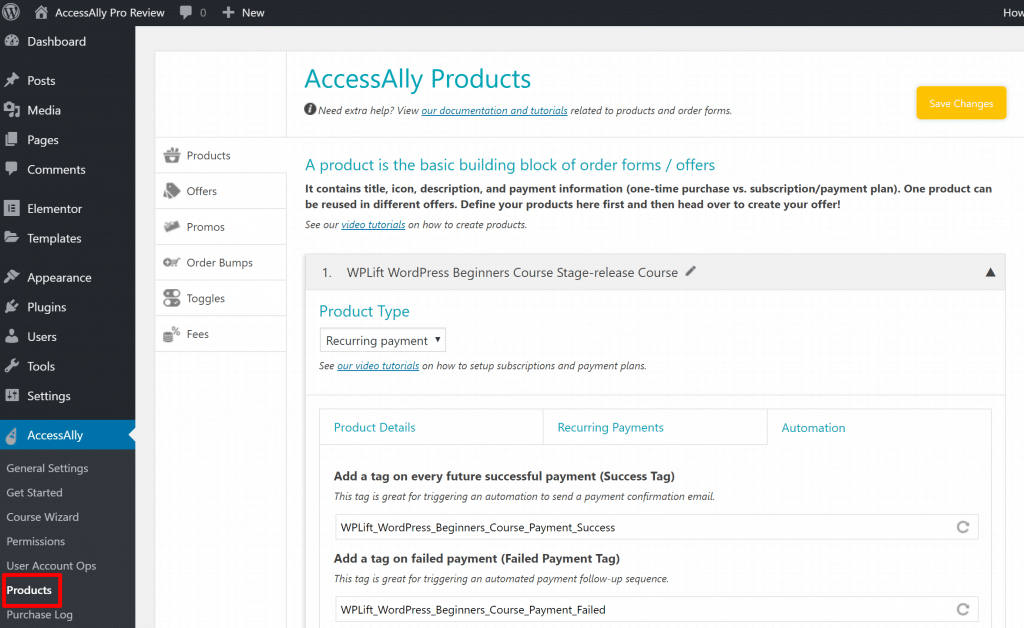
Managing Products And One-Click Upsells
The Products area lets you manage all of your “products”, like the price of a course and its associated tagging:
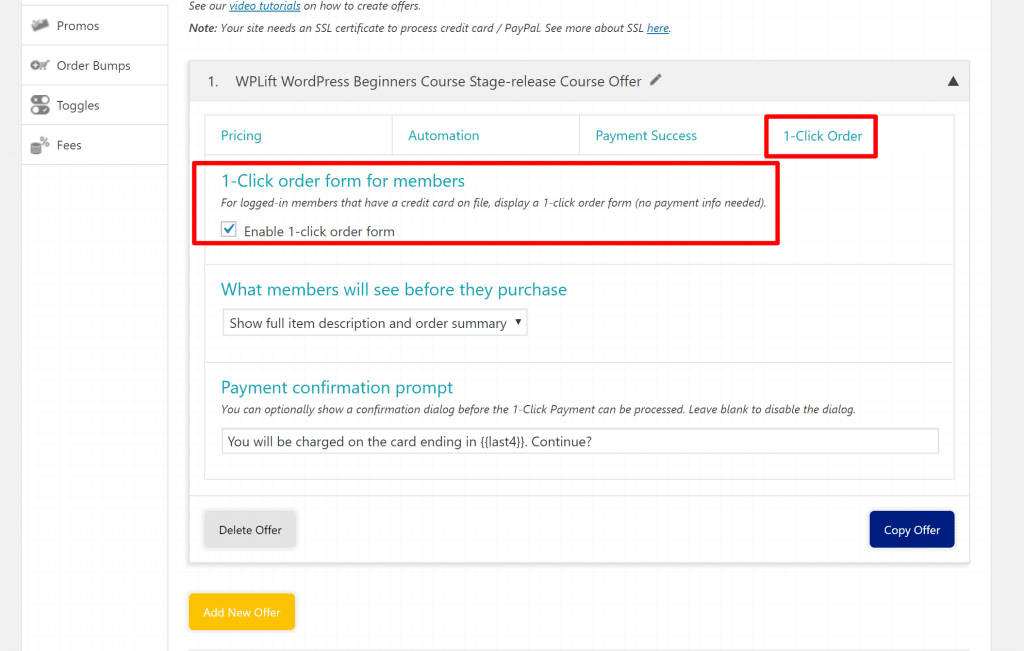
This area is also where you can create your one-click upsells, though.
For example, you could create special pricing for a course and then let registered members order with a single click:
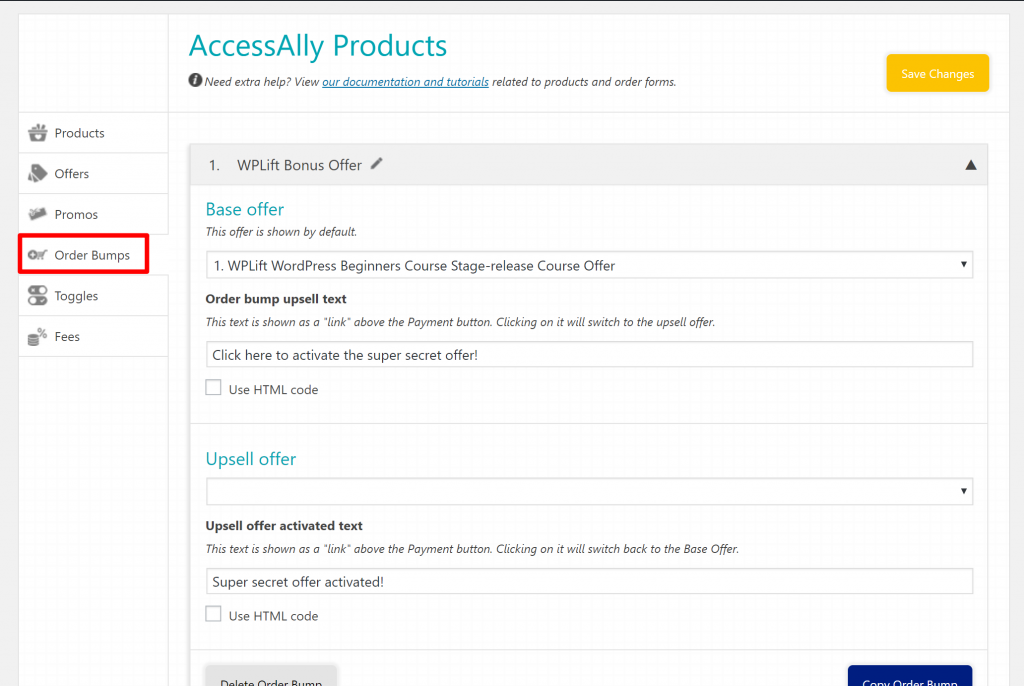
You can also set up “order bumps” as another way to upsell offers:
Managing Affiliate Program
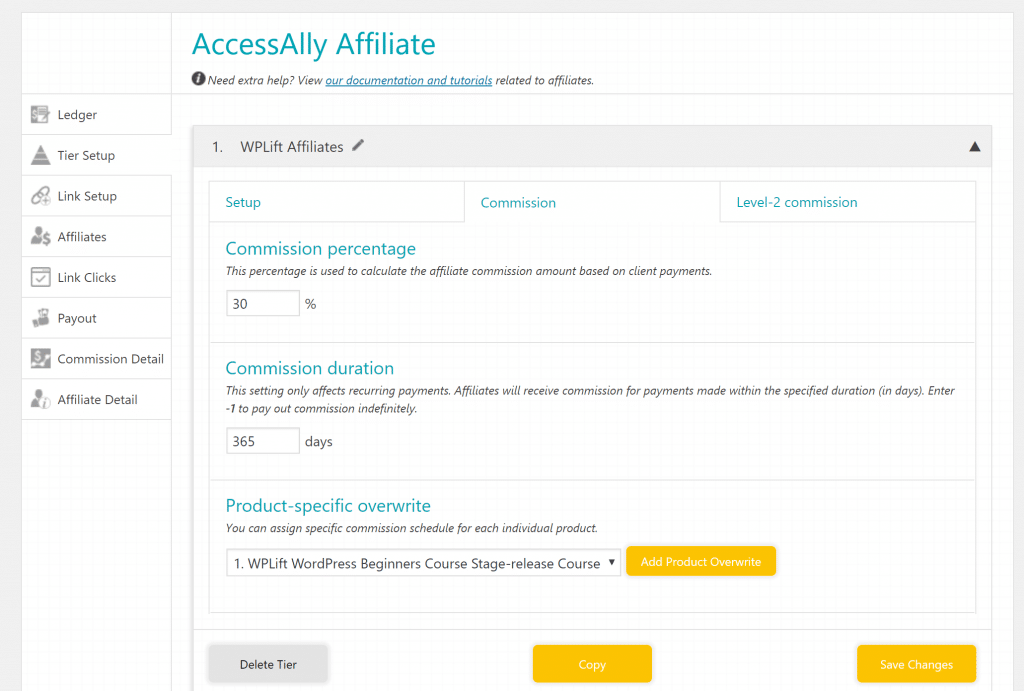
The Affiliates area lets you set up and manage your site’s affiliate program (and affiliates).
You can create different tiers, and even offer multi-level commissions:
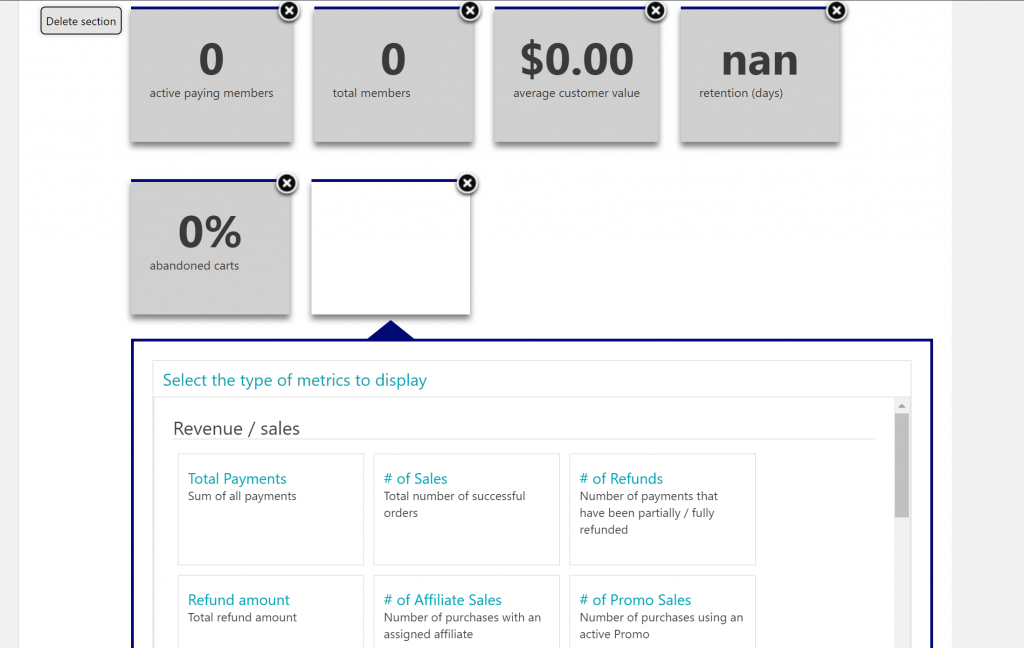
Creating a Custom Metrics Dashboard
The Metrics area lets you build and customize your own analytics dashboard using all of your store’s stats:
AccessAlly Pro Pricing: How Much All Of This Will Cost You
AccessAlly Pro uses subscription billing, rather than the one-time payments that you’ll see with many WordPress plugins.
You can either pay monthly or annually (for a discount).
AccessAlly Pro – the version that I looked at in this review – costs:
- $99 per month paid monthly
- $82 per month paid annually
There’s also a cheaper version called AccessAlly Essentials that costs $79 per month (monthly) or $65 per month (annually). However, this version lacks the learning management system features that you get with ProgressAlly. For example, there are no:
- Quizzes
- Video bookmarking/analytics
- Homework
- Course certificates
Final Thoughts on AccessAlly Pro
Let’s start with one criticism – I found the course content builder itself to be less intuitive than the builders that LearnDash and LifterLMS offer. So purely in terms of creating and structuring courses, I prefer those tools’ approaches.
Now for the good stuff, though…
The tagging and automation options are what really impressed me, and I think that’s what the unique selling proposition is. You have so much flexibility for tagging different parts of the process (and then integrating those tags into your CRM of choice for automation).
In addition, I like the detailed payment options. Beyond just generic payment forms, the ability to create one-click upsells and order bumps creates a really frictionless buying experience, which should lead to a boost in revenue.
And other than that, I think a lot of people will like the all-in-one approach. Pretty much everything you need – even including an affiliate program – is available in the core plugin.
So if you find the automation, upsells, and all-in-one approach attractive, I think those are the biggest reasons to choose AccessAlly over the alternatives.